Stargazing in Crater Lake National Park: When and Where to See the Night Sky

Photo: davidwilson1949 via Flickr (CC BY 2.0)
Stargazing Crater Lake National Park adventures begin nearly 7,000 feet above sea level, where the caldera rim rises above much of southern Oregon’s haze and artificial light. On clear, moonless nights, the Milky Way can span the lake from the forested southern rim toward Mount Scott, while bright stars reflect from water filling the collapsed center of ancient Mount Mazama. Successful night-sky viewing here depends on more than darkness. Snow restricts Rim Drive for much of the year, clouds can form quickly over the Cascade crest, and several celebrated overlooks sit beside steep caldera walls. Our guide explains how lunar
Successful night-sky viewing here depends on more than darkness. Snow restricts Rim Drive for much of the year, clouds can form quickly over the Cascade crest, and several celebrated overlooks sit beside steep caldera walls. Our guide explains how lunar phases, seasonal road access, elevation, and viewing direction should shape your plan, then identifies the rim locations that work best for different astronomical targets.
Why the caldera creates an exceptional night sky
Elevation, darkness, and an unobstructed horizon
Crater Lake’s water surface lies at approximately 6,178 feet, while many overlooks stand between 7,000 and 8,000 feet. That elevation places observers above some low-level atmospheric moisture and gives the caldera rim unusually broad sightlines. Communities are sparse immediately around the park, especially to the east across the forest and high desert, so artificial skyglow remains limited compared with major Pacific Northwest population centers.
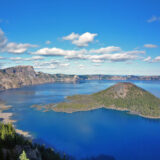
The lake occupies a caldera formed when Mount Mazama collapsed after a massive eruption about 7,700 years ago. Its basin measures roughly 5 miles wide and is surrounded by a broken volcanic rim rather than a single dominant summit. That circular geography gives stargazers several viewing orientations. The western rim works well for the Milky Way’s brighter summer core, while eastern viewpoints provide open views toward sunsets, planets, and celestial objects moving across the southern sky.
How the lake changes what you see
At 1,943 feet, Crater Lake is the deepest lake in the United States. Its surface can appear nearly black after astronomical twilight, creating a striking foreground for star photography. Reflections require calm air, however. Even light wind can break stars and planets into wavering streaks, while haze or smoke can erase the far rim despite a clear sky overhead.
Standing at a rim overlook after twilight, you feel cold air draining off the surrounding slopes while loose pumice crunches beneath your shoes. The far wall becomes a black silhouette several miles away, and ordinary sounds carry across the open basin. When the Milky Way rises, its scale becomes easier to grasp because the caldera provides a visible horizon and Wizard Island anchors the darkness below.
When to plan stargazing in Crater Lake National Park
Summer access and Milky Way season
July through September usually provides the most practical combination of open roads, milder nighttime temperatures, and access to overlooks around the 33-mile Rim Drive. The Milky Way’s bright galactic core is prominent on moonless summer nights, generally appearing toward the southeast or south before shifting westward as the night advances. In July, lingering snowbanks can remain near high overlooks even when pavement is dry.
August often brings warmer afternoons and long stretches of dry weather, but wildfire smoke can reduce transparency across the Cascades. September delivers longer nights, fewer insects, and earlier darkness. Temperatures can fall below freezing at rim elevations during any of these months, so daytime forecasts from nearby lower communities are poor guides to conditions beside the lake.
Autumn, winter, and spring tradeoffs
October can produce exceptionally transparent air between storms, although snow may close sections of Rim Drive with little warning. During winter and spring, the north entrance and most rim roads are generally buried. The southern approach via Oregon Route 62 commonly remains the principal route toward Rim Village, but severe weather can interrupt access. Annual snowfall averages roughly 41 feet, illustrating why the park’s winter landscape persists well into spring.
| Period | Primary advantage | Main constraint |
|---|---|---|
| July to August | Broad rim access and strong Milky Way visibility | Late sunsets, crowds, and possible wildfire smoke |
| September | Longer darkness and cooler, often crisp air | Freezing nights and early snowstorms |
| October to June | Bright winter constellations and snow-covered foregrounds | Major road closures, storms, and difficult nighttime travel |
Choosing the moon phase
Plan deep-sky viewing within several nights of the new moon. A first-quarter moon illuminates the caldera during the evening before setting later at night, which can help photographers capture the rim and stars in separate exposures. A full moon suppresses the Milky Way but reveals Wizard Island, snowfields, and the inner caldera walls. Check moonrise and moonset times for the park’s coordinates rather than relying only on the calendar date.
Stargazing in Crater Lake National Park from the southern rim
Rim Village for straightforward nighttime access
Rim Village is the most practical starting point for first-time visitors because the southern approach reaches this developed rim area before continuing around the lake. Nearby viewpoints look north across Wizard Island and the caldera. Buildings, parked vehicles, and occasional headlights can interfere with dark adaptation, so walk away from active traffic while remaining on established paved or hardened surfaces.
The southern rim also allows visitors to scout their position in daylight. Identify barriers, trail edges, and the safest route back to the vehicle before sunset. Current entrance requirements, road status, facility hours, and any nighttime restrictions can change, so confirm current details on the official park site before leaving areas with reliable mobile service.
Discovery Point and the westward view
Discovery Point lies west of Rim Village and provides a strong composition across Wizard Island. The Discovery Point Trail follows the rim for approximately 2.4 miles round trip from Rim Village, with repeated openings through mountain hemlock and lodgepole pine. Its exposed cliff edges make a daylight reconnaissance essential. For nighttime observing, many visitors are better served by using an established roadside viewpoint rather than walking the entire trail in darkness.
The Watchman corridor
Farther west, Watchman Overlook places Wizard Island prominently below the rim and offers broad views toward the western sky. The nearby Watchman Peak Trail climbs about 420 feet over a 1.6-mile round trip to a historic fire lookout at approximately 8,013 feet. Sunset hikers frequently use it, but loose volcanic tread, darkness, wind, and steep slopes demand a headlamp and conservative turnaround plan.
Eastern and northern viewpoints after dark
Cloudcap Overlook for altitude and open sky
Cloudcap Overlook sits at roughly 7,865 feet on the eastern rim and is reached by a spur from Rim Drive when seasonal roads are open. As one of Oregon’s highest paved viewpoints, it provides a broad eastern horizon and less visual interference from developed areas. Its exposure also means stronger wind and a rapid temperature drop after sunset.
Mount Scott, the park’s highest point at 8,929 feet, rises south of the overlook and can block part of the low southern sky. The mountain remains useful as a photographic silhouette, particularly when the Milky Way angles above it. The 4.4-mile round-trip Mount Scott Trail is better treated as a daytime hike unless the party has extensive backcountry navigation experience.
Where to go stargazing in Crater Lake National Park beyond busy overlooks
The northern rim and Pumice Desert corridor provide darker surroundings and broad views away from Rim Village when Rim Drive is fully open. Pumice Desert is a high basin where deep volcanic deposits and frost limit tree growth, creating a wider horizon than the surrounding lodgepole pine forest. It is especially useful for watching meteor showers whose radiant climbs in the northeastern sky.
- For the Milky Way core: favor western or southwestern rim viewpoints with a clear southern horizon.
- For meteor showers: choose an open northern or eastern viewpoint and avoid looking directly at the radiant.
- For moonlit caldera photography: use the southern or western rim, where Wizard Island supplies scale.
- For planets near sunrise: select an eastern overlook only when road access and weather allow a safe predawn arrival.
Reading the weather before darkness settles
Transparency matters more than a simple clear forecast
A cloudless icon does not guarantee sharp stars. Check upper level cloud cover, humidity, wind, and smoke movement before committing to a rim location. Thin cirrus creates halos around bright stars, while wildfire smoke dims the Milky Way and turns the horizon brown even when constellations remain visible overhead. Wind forecasts are especially important at Cloudcap and the Watchman corridor, where exposed terrain can shake tripods and make temperatures feel substantially colder.
Use twilight to evaluate the caldera
Reach the chosen overlook before sunset and watch the far rim as daylight fades. A crisp outline usually indicates useful transparency, while a fading or discolored rim suggests haze or smoke. Astronomical darkness begins only after the sun reaches 18 degrees below the horizon, which can take well over an hour after sunset in summer. Use that interval to focus the camera, locate north, and identify the safest route between the viewpoint and vehicle.
Build a practical night photography setup
Camera settings for stars and volcanic foregrounds
A wide lens between 14 and 24 millimeters captures the Milky Way above the caldera without requiring a panoramic sequence. Start near f/2.8, ISO 3200, and an exposure of 10 to 20 seconds, then inspect stars at full magnification for trailing. Modern high resolution cameras often require shorter exposures than the traditional 500 rule suggests. Focus manually on a bright star and tape the focus ring once the star appears as a small point.
| Subject | Useful starting point | Adjustment to make |
|---|---|---|
| Milky Way | 14 to 24 mm, f/2.8, 10 to 20 seconds | Raise ISO before lengthening an exposure that already shows trails |
| Moonlit caldera | 24 to 35 mm, f/4, 2 to 8 seconds | Reduce ISO to preserve snow and lunar highlights |
| Star trails | Repeated 20 to 30 second frames | Stack images later to limit sensor noise |
Control light around other observers
Eyes need roughly 20 to 30 minutes to approach useful dark adaptation, and one burst from a headlamp can reset that process. Use a dim red light pointed at the ground, cover bright vehicle displays, and avoid unlocking a car repeatedly if its exterior lights activate automatically. For Stargazing Crater Lake National Park responsibly, keep tripods clear of walkways and move away from photographers before using any necessary white light.
A safe plan from sunset through the drive back
Sequence the evening instead of improvising
Begin with a daylight circuit of the intended overlook, then eat and add warm layers before the temperature drops. Photograph the blue hour, remain through astronomical twilight, and reserve at least 30 minutes for unaided observing after putting the camera away. A compact plan reduces unnecessary movement near the rim and helps drivers leave before fatigue becomes a serious concern on narrow, curving roads.
- Park only in a designated pullout and orient the vehicle for an uncomplicated departure.
- Mark cliff edges, curbs, and uneven volcanic rock while daylight remains.
- Keep keys, headlamp, gloves, and an insulating layer on your body rather than loose beside the tripod.
- Set a departure time and reassess sooner if fog, smoke, wind, or condensation increases.
- Drive slowly and watch for deer and other wildlife entering the roadway.
Prepare for cold, elevation, and limited services
Bring an insulating jacket, warm hat, gloves, water, and footwear with firm traction even during August. The rim’s elevation can aggravate headache, dehydration, and fatigue, particularly after a strenuous day hike. Mobile coverage is unreliable in much of the park, and nighttime help may be distant. Stay behind barriers, avoid informal paths toward the caldera, and never step onto snowbanks that could conceal unstable edges or steep dropoffs.
Leave with an unforgettable view of Crater Lake National Park’s night sky
The strongest plan combines a moon phase suited to the intended subject, a viewpoint matched to the viewing direction, and a realistic reading of road and atmospheric conditions. Rim Village simplifies a first visit, the Watchman corridor frames Wizard Island, Cloudcap opens the eastern sky, and the Pumice Desert corridor provides broad horizons when the seasonal road system is accessible.
Scout in daylight, allow time for full darkness, protect night vision, and carry clothing appropriate for a high Cascade rim after midnight. Those choices turn a brief overlook stop into a productive observing session while reducing risk around cliffs and winding roads. Crater Lake supplies the rare foreground: a vast volcanic basin, dark water, Wizard Island, and nearly unobstructed sky held within the rim of Mount Mazama.
Want to keep exploring? Browse all our Crater Lake guides and articles for more trip-planning tips and ideas.
Gear & Essentials
Tell us about your trip and we will add what else you will want:
The basics
Worth having in the car whatever the park.
For this trip
Traveling with kids
Bringing a pet
RVing
Backcountry
Winter conditions
On the water
Photography
Accessibility
As an Amazon Associate we earn from qualifying purchases, at no extra cost to you.