
White Sands National Park Travel Guide: Best Hikes, Scenic Drives, and Sunset Tips
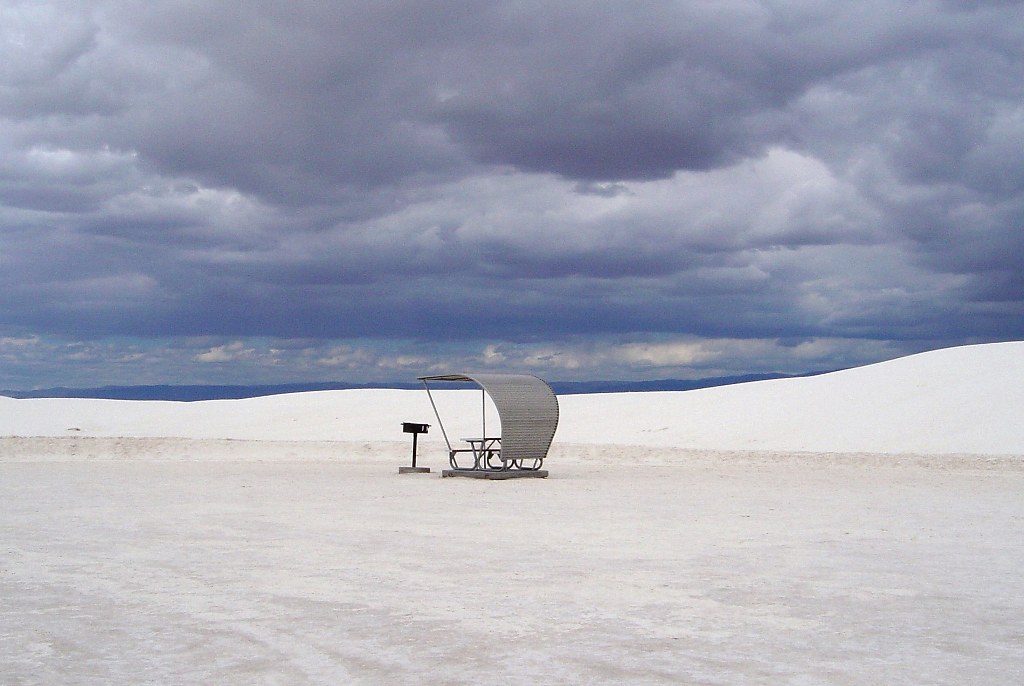
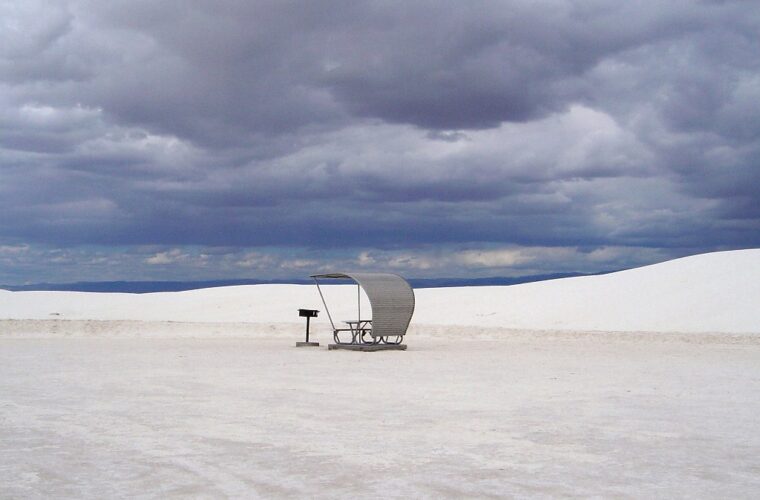
Photo: Road Travel America via Flickr (CC BY 2.0)
White Sands National Park rewards photographers most in the final two hours before sunset, when low light reveals dune ridges, wind ripples, and sweeping curves that disappear under a high midday sun. Arrive early enough to scout beyond the busiest roadside pullouts, then choose a west facing ridge for glowing gypsum or an east facing slope for blue shadows and graphic contrast. Morning brings cleaner sand and fewer footprints, while sunset usually delivers warmer color and a greater chance of dramatic clouds.
The park occupies the northern Chihuahuan Desert in southern New Mexico’s Tularosa Basin, about 15 miles southwest of Alamogordo and roughly an hour from Las Cruces. Its dunes are made from gypsum crystals carried from the San Andres Mountains into low points such as Lake Lucero, then broken down and pushed northeast by prevailing winds. The wider dunefield covers approximately 275 square miles, making it the world’s largest gypsum dune field. Most visitor access begins along Dunes Drive at an elevation near 4,000 feet.
Planning Your White Sands National Park Travel and Photography Visit
Dunes Drive extends 8 miles from the visitor center into the heart of the dunes, creating a roughly 16 mile round trip. The first portion is paved, while the final miles cross a firm gypsum surface that resembles a snow covered road. Ordinary passenger cars generally handle it comfortably in dry conditions. Allow at least 45 minutes for an uninterrupted circuit, or three to five hours when stopping for trails, scouting, and sunset photography.
Operating hours, closures, and sunset access
Park opening and closing times shift through the year, and the available window after sunset can be limited. Nearby White Sands Missile Range also conducts testing that occasionally closes part of U.S. Route 70 and delays access to the park. Check the day’s operating hours, road status, entrance requirements, and any missile test closure on the official park site before committing to a sunrise or blue hour plan.
How weather changes the photographs
Spring commonly brings strong afternoon winds, which can erase footprints and sharpen ripple patterns but also send gypsum into cameras, tripods, and eyes. Summer afternoons are hot, with thunderstorms capable of producing lightning, localized downpours, and colorful skies. Autumn generally combines milder temperatures with lower humidity. Winter mornings can fall below freezing, and occasional frost or snow creates rare tonal layers against the pale dunes and dark Sacramento Mountains.
Choosing morning or evening light
Morning is the best choice for undisturbed dune faces because overnight wind can smooth tracks left by visitors. Look west shortly after sunrise for warm illumination on ridges, or turn east to isolate cool shadow patterns. Evening provides stronger access to classic sunset compositions, particularly silhouettes of soaptree yuccas and people walking along dune crests. After sunset, gypsum continues reflecting ambient light longer than darker desert soils, making the early blue hour especially productive.
Top Photography Stops Along White Sands National Park’s Scenic Dunes Drive
The most productive strategy is to use named trails and picnic areas as access points, then walk away from the road while maintaining a clear route back. Dunes shift constantly, so individual ridges shown in older photographs may have changed. Search for clean repeating forms rather than trying to reproduce a fixed composition. The interior portion of Dunes Drive provides the tallest, least vegetated dunes, while locations closer to the entrance reveal more of the basin’s ecology.
White Sands National Park locations by light and access
| Location | Access | Best light | Primary subjects |
|---|---|---|---|
| Playa Trail | Approximately 0.5 mile round trip | Morning or after rain | Cracked earth, shallow water, distant mountains |
| Dune Life Nature Trail | Approximately 1 mile loop | Early morning | Yucca, animal tracks, transitional dunes |
| Interdune Boardwalk | Approximately 0.4 mile round trip | Late afternoon | Accessible viewpoints, grasses, dune edges |
| Backcountry Camping Trail | Approximately 2 mile loop | Final two hours before sunset | Open dunes, ridge lines, sparse vegetation |
| Alkali Flat Trail | Approximately 5 mile loop | Morning or late afternoon | Large dunes, San Andres Mountains, abstract patterns |
The Alkali Flat Trail for large scale landscapes
Despite its name, the Alkali Flat Trail repeatedly climbs and descends steep dunes before reaching the edge of the dry Lake Otero basin. Red trail markers indicate the route across a landscape with few permanent reference points. The open terrain supports wide compositions that place the dark San Andres Mountains behind bright gypsum. A moderate telephoto lens can compress the ridges, creating layered bands of white, blue, and gray.
On an exposed crest, gypsum grains feel cool and firm underfoot even when the air remains warm. Each step sinks at the dune’s loose edge, and the sound of the road fades behind successive ridges. Late sunlight catches the wind carved ripples first, then drops the leeward slope into blue shadow. The scale becomes clear when a distant walker appears as a small figure against several uninterrupted curves.
Dune Life Nature Trail and the ecological edge
This loop crosses the transition between desert scrub and active dunes, making it better for ecological storytelling than completely bare sand. Soaptree yuccas survive as gypsum accumulates by extending their stems upward, leaving much of each plant buried beneath the dune. Skunkbush sumac, grasses, bleached earless lizards, and tracks from kit foxes or pocket mice provide foreground subjects. A low camera position can align vegetation with a clean ridge while excluding nearby development.
Best Hikes in White Sands National Park for Clean Dunes and Strong Compositions
Trail distance alone understates the effort required at White Sands National Park. Soft sand slows each climb, reflective gypsum increases sun exposure, and marker to marker navigation demands attention. Carry water even on short walks, photograph the number or location of the trailhead, and turn around before fading light makes the route difficult to follow. GPS tracks can help, but blowing sand and moving dunes make the park’s physical markers the primary guide.
Backcountry Camping Trail at golden hour
The Backcountry Camping Trail offers a useful balance between manageable distance and separation from Dunes Drive. Its roughly 2 mile loop enters broad dune fields where walkers can find untracked ridges without completing the strenuous Alkali Flat route. For sunset, scout an east facing slip face first, then position yourself where sidelight traces the crest. Leave enough time to retrace the marked route rather than walking directly toward road noise or headlights.
Interdune Boardwalk for detail studies
The elevated boardwalk crosses a relatively stable interdune area where the water table and compacted ground support grasses and seasonal wildflowers. It works well for photographers who cannot safely manage steep, loose dunes or who want close studies of plant adaptation. A longer lens helps isolate seed heads against pale sand, while a polarizing filter can deepen blue sky. Avoid maximum polarization with very wide lenses because it can create an uneven dark band overhead.
A practical trail photography sequence
- Scout broad shapes first: identify one dominant ridge, a clean background, and an exit route before unpacking equipment.
- Check the sand closely: move several yards if footprints, sled tracks, or windblown debris interrupt the foreground.
- Shoot high and low: standing height emphasizes layered dunes, while a camera close to the surface enlarges ripples and cracked gypsum.
- Wait for scale: place a person on a distant crest rather than close to the lens, which preserves the apparent size of the landscape.
- Protect the route back: begin returning while trail markers remain visible, particularly after photographing sunset away from Dunes Drive.
White Sands National Park Sunset, Golden Hour, and Blue Hour Tips
Clock times vary substantially by season, so plan around the published sunrise and sunset rather than a fixed hour. Begin scouting approximately 90 minutes before sunset in summer and two hours before sunset in winter, when low sun develops sooner across the southern sky. The strongest side lighting generally occurs during the final 45 minutes of direct sun. Blue hour begins after the sun drops behind the San Andres Mountains, although surrounding peaks can block direct light before the calculated sunset.
Seasonal Light and Sunset Patterns at White Sands National Park
Winter produces the longest shadows and the lowest sun angle, useful for abstract ridge compositions throughout more of the day. Spring wind can rebuild pristine surfaces between frames, but airborne gypsum reduces contrast and creates a pale atmospheric veil. Summer monsoon clouds add scale and color, particularly when isolated rain shafts cross the basin. Autumn often provides dependable side light with less intense heat, allowing photographers to scout farther from the road before sunset.
Exposing white gypsum without losing texture
Camera meters often render bright gypsum as middle gray, especially when the frame contains mostly sand. Add positive exposure compensation while watching the histogram and highlight warning, then reduce exposure slightly if sunlit ridges begin clipping. Bracket frames when the sky remains bright above shadowed dunes. Texture depends more on directional light than aggressive processing, so preserve subtle tonal transitions instead of pushing whites uniformly toward featureless brightness.
Subjects and Techniques Beyond the Wide Landscape
White Sands National Park supports tighter studies as effectively as broad dune panoramas. A lens in the 70 to 200 mm range can isolate intersecting crests, compress mountain layers, and remove footprints from the frame. Macro and close focusing lenses reveal gypsum crystals, wind scallops, seeds, and tracks. Before approaching a pattern, photograph it from several steps away so your own prints do not eliminate alternative compositions.
Foreground texture and temporary reflections
Place the camera within a foot of undisturbed ripples and use a small aperture to carry focus toward a yucca or distant ridge. Focus stacking produces cleaner detail than stopping down beyond f/16, where diffraction softens fine gypsum texture. Two to four frames focused progressively from foreground to background are usually enough for a composition made with a moderate wide angle lens.
The Playa Trail can hold shallow water after substantial rain, creating rare reflections of clouds and basin mountains. These pools may be thin and short lived, so use a low camera position to enlarge their apparent depth. A circular polarizer can either reveal the cracked surface beneath the water or strengthen the reflection. Rotate it while watching the live view rather than automatically applying maximum polarization.
Wildlife behavior and track photography
Cool mornings provide the clearest evidence of nocturnal activity. Kit fox, badger, rodent, and bird tracks may cross otherwise smooth slopes before wind softens their edges. Photograph a track sequence at an angle so side light defines each depression. Bleached earless lizards become active during warmer periods and rely on pale coloration for camouflage, so watch the bases of vegetation and avoid surrounding an animal for a closer frame.
Long exposures after direct light fades
A tripod allows exposures of several seconds during blue hour, when gypsum reflects enough ambient light to retain detail. Keep image stabilization off when the camera is firmly mounted, use a delayed shutter or remote release, and inspect frames for wind movement in yucca leaves. During summer storms, longer exposures can turn rain shafts into soft vertical bands, but lightning requires immediate retreat to a vehicle because exposed dune crests offer no protection.
Camera Gear for Gypsum, Wind, and Temperature Swings
Fine gypsum enters lens barrels, tripod locks, camera bags, and battery compartments. Complete lens changes inside a closed vehicle when wind is strong, and carry the camera with its mount facing downward during a quick change. A clear protective filter is useful during blowing sand, although removing it for backlit scenes can reduce flare and internal reflections.
A compact field kit
| Equipment | Best use | Condition to manage |
|---|---|---|
| 16 to 35 mm lens | Ripple foregrounds and expansive skies | Keep tripod legs and feet outside the frame |
| 70 to 200 mm lens | Layered ridges, wildlife, and mountain compression | Use a hood when shooting across blowing gypsum |
| Tripod with broad feet | Blue hour, brackets, and focus stacks | Extend the thickest leg sections first |
| Lens cloth and hand blower | Removing loose crystals | Blow particles away before wiping glass |
| Rain cover and dry bag | Monsoon cells and wet playa margins | Pack equipment before rain reaches the dunes |
Protecting equipment in the field
Do not grind tripod leg sections closed while they are coated with gypsum. Brush or blow them clean first, then wipe the lower sections with a slightly damp cloth after leaving the park. Keep spare batteries close to the body on freezing winter mornings, since cold reduces their usable capacity. At roughly 4,000 feet, sun and dry air also accelerate dehydration during long sessions.
- Carry a dedicated cloth for hands so moisture and sunscreen do not reach filters.
- Pack equipment in sealable bags before returning to an air conditioned vehicle after humid summer weather.
- Bring a headlamp with a red setting for packing after sunset without destroying night vision.
- Use a bright strap or reflective marker so pale accessories remain visible when placed on gypsum.
Compositions That Fit the Dunefield
The strongest frames usually depend on separation between ridges. Move laterally until one crest no longer merges with the next, then check every edge of the viewfinder for clipped yuccas or intruding footprints. Gypsum reflects color from the sky, so white balance controls mood. Daylight balance preserves the natural shift from warm direct light to cool shadow, while automatic white balance may neutralize that distinction.
Using curves, shadows, and negative space
Build around one clean ridge
A single diagonal crest can divide illuminated gypsum from shadow and carry the eye through an otherwise spare frame. Position its highest point away from the center, then wait for a cloud, walker, or yucca to balance the open area. Vertical framing works particularly well when ripples occupy the lower third and a small subject appears near the crest.
Control scale with focal length
Wide lenses exaggerate nearby ripples but can make distant dunes appear shallow. Telephoto lenses reveal the dunefield’s depth by stacking crests and reducing empty sky. For a person on a ridge, shoot from far enough away that the figure remains small and fully separated from the horizon. Obtain permission before making recognizable photographs of other visitors.
Panoramas and monochrome studies
For a panorama, level the tripod and overlap vertical frames by about one third. Lock exposure, focus, and white balance so the stitched file does not show bands between images. Black and white processing works best when low sunlight has already created clear tonal structure. Use local contrast sparingly, since excessive clarity makes smooth gypsum look gritty and exaggerates sensor dust.
Plan the Photograph Before Chasing the Light
A productive visit combines location choice with a specific visual goal. Use transitional areas for plants and tracks, open interior dunes for clean geometry, and the playa for weather dependent reflections. Scout with a moderate lens, mark a safe return route, and reserve the final direct light for a composition already selected rather than searching while shadows lengthen.
Bring equipment that can withstand wind, protect it before conditions deteriorate, and stay through early blue hour when access permits. White Sands National Park changes with every storm and gust, so successful photography comes from reading fresh surfaces, directional light, and temporary weather rather than reproducing a fixed viewpoint. That approach yields stronger images while keeping travel across the dunes deliberate and safe.
Want to keep exploring? Browse all our White Sands guides and articles for more trip-planning tips and ideas.
Gear & Essentials
Tell us about your trip and we will add what else you will want:
The basics
Worth having in the car whatever the park.
For this trip
Traveling with kids
Bringing a pet
RVing
Backcountry
Winter conditions
On the water
Photography
Accessibility
As an Amazon Associate we earn from qualifying purchases, at no extra cost to you.