White Sands National Park Travel Guide: Best Hikes, Sunset Spots, and Sand Sledding Tips
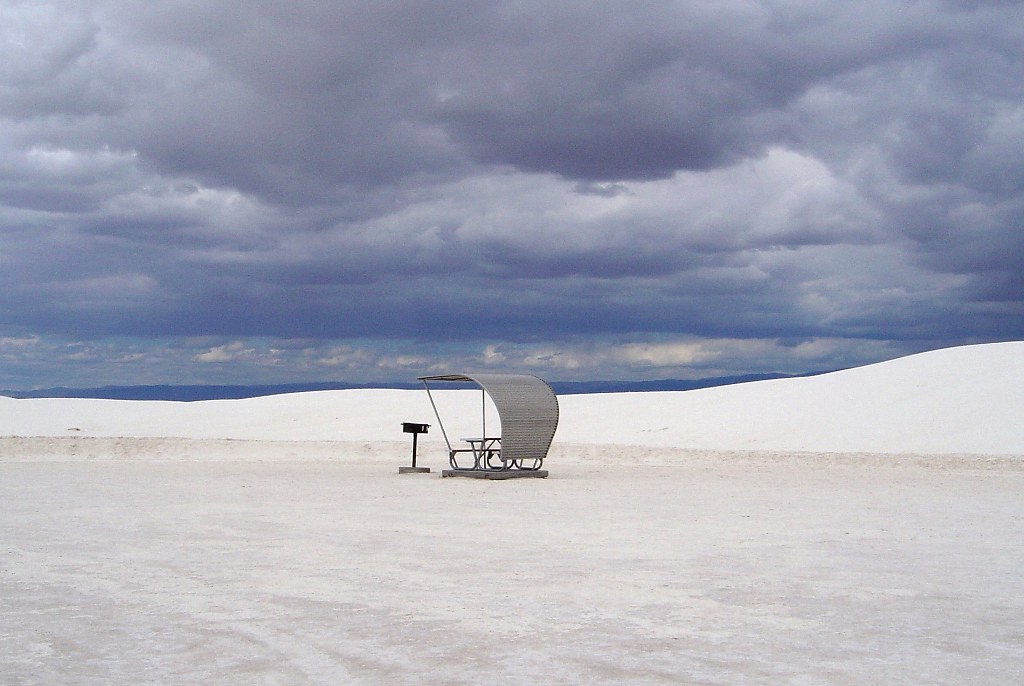
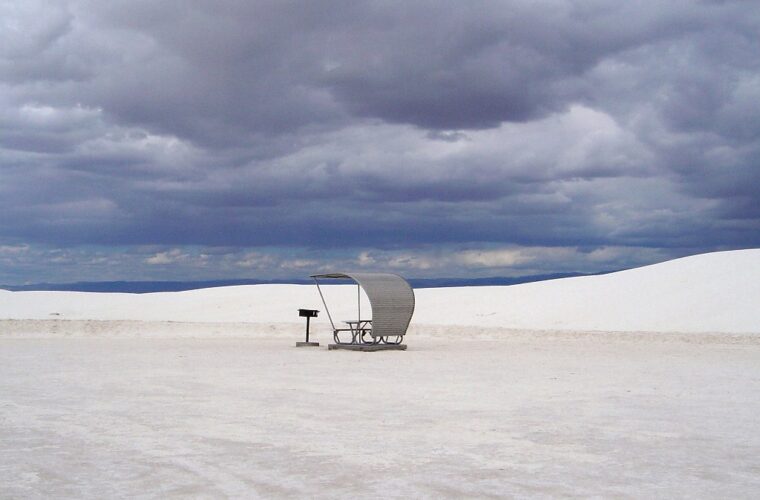
Photo: Road Travel America via Flickr (CC BY 2.0)
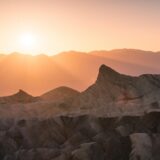
At White Sands National Park, the Alkali Flat Trail turns lavender near sunset while the western faces of the gypsum dunes hold the day’s last orange light. The crust feels firm underfoot until a step breaks through into cool, loose sand. Wind skims grains along the ridgelines, erasing footprints within minutes, and the San Andres Mountains rise dark beyond the basin. This brief interval produces the park’s strongest color, deepest dune shadows, and most useful relief for photography.
This guide begins with the geography and access details that shape every visit, then identifies the best light, hikes, sunset locations, and compositions. White Sands rewards careful timing because midday glare can flatten the dunes, while evening shadows reveal their curves. Visitors planning to photograph, hike, or sled should also understand how quickly footprints accumulate near parking areas and how easily dune ridges obscure the route back.
Understanding White Sands National Park
White Sands National Park protects part of the world’s largest gypsum dunefield, a roughly 275 square mile expanse within New Mexico’s Tularosa Basin. The visitor center stands at approximately 4,000 feet above sea level, while the dunefield sits within a mountain ring formed by the San Andres and Sacramento ranges. This enclosed basin is essential to the dunes’ formation because water carrying dissolved gypsum has no route to the ocean.
Why the sand is white and cool underfoot
Gypsum eroded from the surrounding mountains collects in low areas such as Lake Lucero. As water evaporates, the mineral crystallizes as selenite. Weather and wind gradually break those crystals into pale grains, then carry them northeast into active dunes. Unlike quartz sand, gypsum reflects much of the sun’s radiation. It can still become uncomfortable during summer heat, but it generally feels cooler than darker desert sand under bare feet.
The dunes are continually moving and changing shape. Crescent shaped barchan dunes occur near the dunefield’s leading edge, while transverse dunes form long, connected ridges farther inside. Stabilized dunes along the margins support more vegetation, including soaptree yucca, skunkbush sumac, and Rio Grande cottonwood. These plants create useful foregrounds, but photographers should avoid trampling the fragile biological crust and dune vegetation around them.
Reaching the dunes and planning around access
The park entrance is about 15 miles southwest of Alamogordo along U.S. Highway 70. Dunes Drive extends 8 miles from the visitor center into the dunefield, making the complete out and back drive approximately 16 miles. Its outer section is paved, while the interior road has a compacted gypsum surface. Passenger cars can normally travel the entire route, although drifting sand and maintenance work can affect conditions.
White Sands lies beside an active missile range. Highway 70 and park access can close temporarily during military testing, sometimes affecting morning or midday plans. Entrance hours, fees, closures, ranger programs, and the latest road status should be confirmed on the official park site. There is no public road through the dunes beyond Dunes Drive, so every hike and photography session begins from designated roadside areas or marked trailheads.
Planning Light for White Sands National Park Photography
Direct midday sun reflects strongly from the gypsum and removes much of the visible texture from dune faces. The most revealing light arrives when the sun is low enough to create alternating bands of illumination and shadow. Sunset is generally easier to photograph than sunrise because public access commonly begins after dawn, while evening access usually includes at least part of the sunset period.
Golden hour and blue hour by season
Golden hour begins roughly 45 to 70 minutes before sunset, depending on season and atmospheric conditions. Winter light remains low for longer and produces extended shadows across south facing ridges. During summer, the sun drops at a steeper angle, so color and contrast can change quickly. Blue hour follows sunset, when the gypsum reflects cool tones from the sky and the mountains retain a narrow rim of warm light.
| Location | Best light | Recommended timing | Primary subject |
|---|---|---|---|
| Alkali Flat Trail | Late golden hour | Begin 90 minutes before sunset | Clean ridges, long shadows, mountain layers |
| Backcountry Camping Trail | Golden hour into blue hour | Begin 75 minutes before sunset | Undisturbed dune curves and yucca |
| Interdune Boardwalk | Morning or late afternoon | Use lower angled side light | Plants, tracks, and dune ecology |
| Dune Life Nature Trail | Early morning | Arrive near opening | Stabilized dunes, wildlife signs, vegetation |
| Roadside sledding areas | Late afternoon | Photograph before peak sunset color | Action, scale, and family scenes |
Exposure and white balance on gypsum
Camera meters often interpret the bright dunes as overexposed and make them gray. Check the histogram and add positive exposure compensation when necessary, while protecting highlights on sunlit ridges. RAW files preserve subtle color shifts that automatic white balance may remove. A low ISO, an aperture around f/8 to f/11, and a tripod work well for layered landscapes. Focus stacking can help when a close ripple pattern leads toward distant mountains.
Wind creates another photographic opportunity. A shutter speed around 1/15 to 1/4 second can record grains streaming from a ridge, while faster speeds freeze airborne sand. Keep the sun slightly outside the frame or shield the lens to reduce flare. During blue hour, exposures may extend to several seconds, smoothing moving sand while preserving the sharp edge of a stable crest.
Best Hikes and Photography Spots in White Sands National Park
The most accessible roadside pullouts attract sledders and develop dense footprints by afternoon. Cleaner compositions require walking farther into the dunefield, particularly after a calm night or a period of wind that has resurfaced the slopes. Trail markers are essential navigation references because tracks disappear quickly and one dune basin can look almost identical to the next.
Alkali Flat Trail for the broadest dune views
The Alkali Flat Trail is a strenuous 5 mile loop marked by colored posts. Despite its name, it repeatedly climbs and descends steep dunes rather than crossing level ground. The route reaches expansive terrain with fewer plants and wider views toward the San Andres Mountains. For sunset photography, many visitors need only follow the markers for 30 to 45 minutes before choosing a ridge with an unobstructed western view.
How to compose the dune ridges
Use a telephoto lens to compress overlapping crests and isolate alternating bands of light and shadow. With a wider lens, place wind carved ripples or a single yucca in the lower third of the frame. Walk parallel to the ridge instead of directly onto the intended foreground. This preserves an unbroken surface and prevents your own tracks from becoming the dominant line in the photograph.
Backcountry Camping Trail for quieter sunset frames
This 2 mile loop enters rolling dunes that usually feel less exposed than the Alkali Flat route. It offers a productive balance between hiking effort and access to clean sand. Low yucca leaves, animal tracks, and curving slip faces provide foreground detail, while taller dunes help block parked vehicles from view. Keep the next trail marker in sight before leaving the established route for a composition.
Reading tracks without disturbing wildlife
Look along shaded slopes for the fine trails left by darkling beetles, lizards, kit foxes, and small rodents. Tracks photograph best under low side light, which casts tiny shadows into each impression. Use a longer focal length when an animal is present, and never surround or pursue it across open sand. Many dune species conserve energy by remaining underground during the hottest part of the day.
Shorter trails for limited time or mobility
The half mile Playa Trail leads to a seasonal lakebed where cracked earth, storm clouds, and distant dunes create a different visual vocabulary. The roughly 0.4 mile Interdune Boardwalk provides a firm route into the transition zone between desert scrub and moving sand. The 1 mile Dune Life Nature Trail climbs into stabilized dunes and is especially useful for photographing yucca, tracks, and ecological adaptations without committing to the park’s longer loops.
- For uninterrupted dune layers: Choose the Alkali Flat Trail and carry enough water for repeated climbs.
- For sunset with a shorter return: Use the Backcountry Camping Trail and turn around before completing the full loop.
- For plants and animal signs: Walk the Dune Life Nature Trail when shadows still cross the sand.
- For storm reflections: Check the Playa Trail after seasonal rain, but avoid saturated ground and approaching lightning.
- For a firm walking surface: Use the Interdune Boardwalk and frame vegetation against open gypsum.
Protecting Camera Gear in Gypsum Sand
Gypsum grains are fine enough to enter lens barrels, tripod locks, and camera bag zippers. Wind makes the problem worse by carrying sand several feet above a dune crest. Change lenses inside a closed bag or vehicle, and mount the lens you expect to use before hiking. A standard zoom covering roughly 24 to 70mm handles broad landscapes, while a 70 to 200mm lens isolates distant ridges, hikers, and the San Andres Mountains.
Dust control in the field
Keep the camera pointed downward when changing batteries or memory cards so loose grains do not fall into open compartments. A blower removes particles without touching optical surfaces. Avoid wiping gritty glass with a shirt or dry cloth because gypsum can drag harder mineral debris across the coating. After the session, brush sand from tripod feet and collapsed leg sections before extending them again.
- Carry a blower: Remove loose grains before using a microfiber cloth.
- Pack a rain cover: It also shields camera controls during blowing sand.
- Use a sealed bag: Store batteries, cards, and cleaning supplies separately from sandy equipment.
- Bring lens hoods: They reduce flare and keep airborne grains away from the front element.
- Avoid extending the center column: A lower tripod remains steadier in gusty conditions.
Choosing equipment for changing conditions
A circular polarizer can deepen blue skies, but it may produce uneven darkening across a wide angle frame and remove useful reflections from wet playa surfaces. Graduated filters are difficult to align with curved ridges, so exposure bracketing usually gives better control. Cold winter evenings drain batteries quickly, while summer heat can warm equipment left inside a parked vehicle. Store spare batteries near your body in cold weather and keep the camera shaded before use.
| Condition | Useful equipment | Practical adjustment |
|---|---|---|
| Blowing gypsum | Rain cover, blower, sealed bag | Avoid lens changes on exposed ridges |
| Summer heat | Lens hood, insulated water supply | Schedule long walks for late afternoon |
| Winter cold | Spare batteries, light gloves | Protect batteries during blue hour |
| Storm light | Tripod, remote release, rain cover | Bracket exposures while maintaining a safe retreat |
Sand Sledding Tips for White Sands National Park
Waxed plastic saucers generally slide better on gypsum than cardboard, inflatable tubes, or narrow snow sleds. Choose a broad dune face with a clear runout and inspect the slope from below before climbing. Rocks, yucca, roads, picnic areas, and other visitors should remain well outside the path. Repeated runs polish a track into the face, so select a slope away from the clean ridges you intend to photograph later.
Selecting a safe dune face
Moderate slopes provide enough speed for most riders while leaving room to stop on level sand. Sit low, keep arms and legs inside the saucer, and allow the previous rider to clear the runout before starting. Children need close supervision because the far side of a dune can conceal vehicles or steep drop offs. Walking back up is strenuous at roughly 4,000 feet, particularly during hot afternoons, so water and rest breaks remain essential.
Photographing sledding action
Position yourself beside the run rather than below it. A shutter speed of 1/1000 second freezes flying gypsum and facial expressions, while 1/60 to 1/125 second allows a controlled pan that conveys speed. Continuous autofocus works best when acquired near the top of the slope. Late afternoon side light makes airborne grains visible, and a telephoto lens compresses the rider against layered dunes without placing the photographer in the travel path.
Weather, Reflections, and Safe Returns
Spring commonly brings strong winds, summer afternoons can exceed 100 degrees Fahrenheit, and the summer monsoon season can produce lightning and brief heavy rain. Winter days are often comfortable in direct sun, but temperatures can fall below freezing after dark. The basin’s open terrain offers little shelter, and approaching storms remain visible for miles. Leave exposed ridges when thunder develops rather than waiting for rain to reach the trail.
Using rain and storm light
Water sometimes gathers in shallow depressions near the Playa Trail, creating reflections of clouds and the Sacramento Mountains. Compose from firm margins because saturated playa clay can become slick and deeply rutted. After a storm, low sunlight may illuminate falling rain against dark mountains. Use a tripod and exposures between one half second and several seconds to soften moving clouds, but avoid tall tripod setups when lightning is present anywhere nearby.
Navigation after sunset
Dune crests block views of roads, trailheads, and neighboring markers. Record the parking location before leaving the vehicle, carry a physical map, and use a headlamp with fresh batteries for the return. A phone track can help, although heat and cold both reduce battery life. Follow official trail posts rather than a straight compass bearing because direct routes may cross steep slip faces. Turn back early enough to identify the next marker before blue hour fades.
Planning Your White Sands National Park Travel Guide Itinerary
A strong visit to White Sands National Park starts with one clear priority. Choose Alkali Flat for extensive dune layers, the Backcountry Camping Trail for a shorter sunset walk, or the Interdune Boardwalk for ecological detail on a firm surface. Reach the selected area before the best light, preserve an untouched foreground, and leave enough time to change focal lengths rather than chasing multiple distant locations.
Prepare for reflective sun, loose sand, rapid temperature changes, and a darker return than the outward hike. Keep sledding separate from clean landscape compositions, protect equipment before wind rises, and use low side light to reveal ripples, tracks, and gypsum ridges. With those decisions made in advance, the final hour can be spent watching the shadows develop and photographing deliberately instead of solving preventable logistical problems.
Want to keep exploring? Browse all our White Sands guides and articles for more trip-planning tips and ideas.
Gear & Essentials
Tell us about your trip and we will add what else you will want:
The basics
Worth having in the car whatever the park.
For this trip
Traveling with kids
Bringing a pet
RVing
Backcountry
Winter conditions
On the water
Photography
Accessibility
As an Amazon Associate we earn from qualifying purchases, at no extra cost to you.