How to Get to Mount Rainier National Park: Airports, Roads and Getting Around
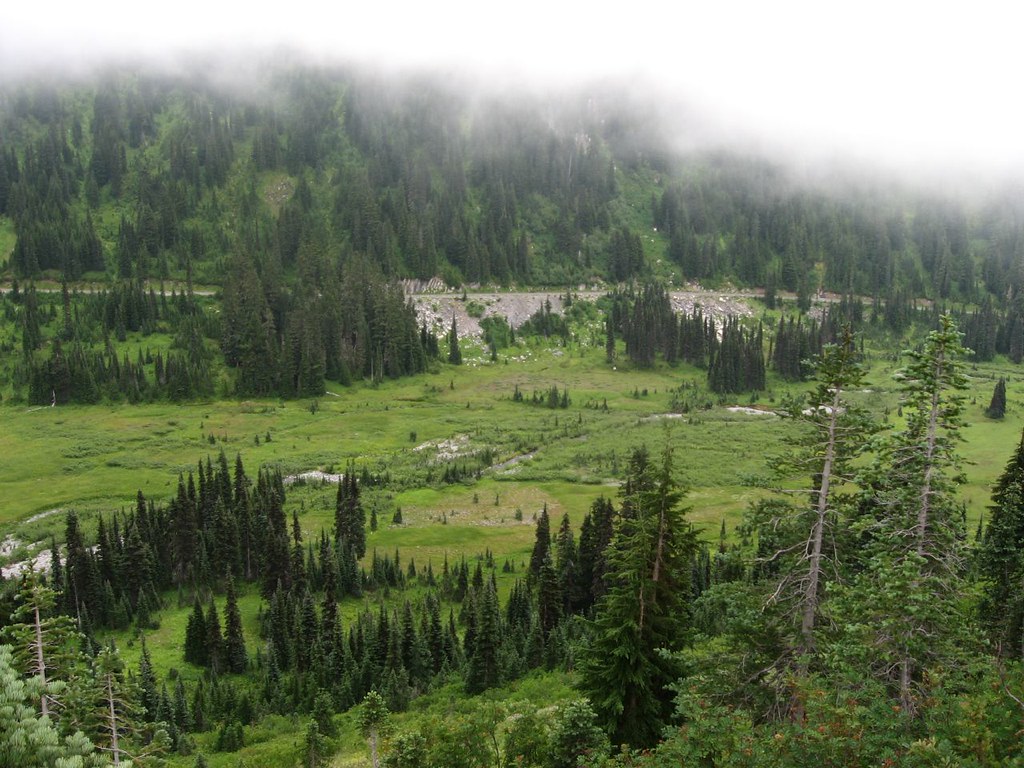
Photo: Ken Lund via Flickr (CC BY-SA 2.0)
Understanding how get Mount Rainier access right begins with choosing the correct side of this 14,410-foot volcano. Mount Rainier National Park has several vehicle entrances, no road crossing directly through its mountainous center, and sharply different access patterns by season. A route that works for Paradise may add hours if your actual destination is Sunrise or Mowich Lake. Our team recommends planning backward from the place you want to visit, then selecting an airport, gateway town, and highway. This guide explains which entrances serve the major developed areas, how far the principal airports are from the park, and where mountain travel begins.
Our team recommends planning backward from the place you want to visit, then selecting an airport, gateway town, and highway. This guide explains which entrances serve the major developed areas, how far the principal airports are from the park, and where mountain roads, snow, congestion, and limited transportation options affect the trip.
How to Get to Mount Rainier: Start with the Right Entrance
Mount Rainier rises southwest of Seattle and east of Tacoma, but “the park entrance” is not a single location. Paradise occupies the south side, Sunrise and White River are on the northeast, Ohanapecosh is in the southeast, and Carbon River and Mowich Lake lie northwest of the mountain. Deep glacial valleys separate these districts, so driving between them usually requires leaving one side of the park and following state highways around the volcano.
Enter your specific trailhead or visitor area into navigation rather than searching only for Mount Rainier National Park. Mobile directions can otherwise select an inconvenient entrance or route drivers onto minor forest roads. Download offline maps before leaving the populated corridor because mobile coverage weakens around Ashford, Packwood, Greenwater, Carbon River, and much of the park interior.
Nisqually Entrance for Paradise and Longmire
Nisqually Entrance, reached from State Route 706, is the primary approach to Longmire and Paradise. It is generally the most logical choice from Seattle, Tacoma, Olympia, and Portland. Longmire sits at roughly 2,700 feet, while the road continues through old growth forest and glacial valleys to Paradise at about 5,400 feet. Paradise provides access to the Skyline Trail, Nisqually Vista Trail, and the main south-side views of the mountain.
Stevens Canyon and Ohanapecosh for the Southeast
The southeast approach uses State Route 123 near Ohanapecosh. This side serves the Grove of the Patriarchs area, Silver Falls, Box Canyon, and the seasonal Stevens Canyon Road toward Paradise. Travelers arriving from Packwood or Oregon often find it efficient, but winter snow closes the higher connecting road. When Stevens Canyon Road is closed, Ohanapecosh and Paradise function as separate driving destinations rather than adjacent stops.
White River and Sunrise for the Northeast
State Route 410 leads toward White River Road and Sunrise, the park’s highest developed vehicle destination at approximately 6,400 feet. The entrance is useful for the White River Campground area, Glacier Basin Trail, Burroughs Mountain, and the Sunrise trail network. White River Road and the final climb to Sunrise are seasonal. Snow commonly prevents vehicle access until summer and closes the road again in autumn.
Carbon River and Mowich Lake for the Northwest
State Route 165 serves both Carbon River and Mowich Lake, but the experiences differ. Carbon River Road is closed to private vehicles beyond the park boundary area, making bicycles and hiking the practical ways to continue into the temperate rainforest. The road to 4,929-foot Mowich Lake is seasonal, with a long unpaved portion that can be dusty, corrugated, and slow. Mowich Lake serves the Spray Park and Tolmie Peak areas.
| Entrance or district | Best for | Primary approach | Typical access pattern |
|---|---|---|---|
| Nisqually | Longmire, Paradise, Skyline Trail | State Route 706 | Main year-round approach, subject to weather controls |
| Ohanapecosh | Silver Falls, southeast forests, Stevens Canyon | State Route 123 | Low areas may be reachable before higher park roads open |
| White River and Sunrise | Burroughs Mountain, Glacier Basin, Sunrise | State Route 410 | Seasonal road access |
| Carbon River | Rainforest travel, cycling, northwest trails | State Route 165 | Vehicle access ends near the boundary |
| Mowich Lake | Spray Park, Tolmie Peak area | State Route 165 | Seasonal, partly unpaved approach |
How to Get to Mount Rainier National Park from Major Airports
Seattle-Tacoma International Airport is the most practical arrival point for most visitors. It has the broadest selection of flights and rental vehicles, and it places travelers between the Seattle and Tacoma highway networks. From the airport, Nisqually Entrance is roughly 85 miles away and commonly requires about two hours without severe congestion. Reaching Sunrise covers a similar straight-line distance but usually takes longer because the route follows slower mountain highways.
There is no comprehensive public transportation system connecting the major airports with all Mount Rainier trailheads and developed areas. A rental car offers the greatest flexibility, especially for sunrise starts, multi-district itineraries, and trailheads beyond gateway communities. Check current entrance charges, vehicle reservation systems, road openings, tire requirements, and operating hours on the official park site before committing to a route.
How to Get to Mount Rainier from Seattle-Tacoma International Airport
For Paradise, drivers generally travel south toward Tacoma, continue through the State Route 7 corridor, and reach Elbe before following State Route 706 through Ashford. For Sunrise, the usual route runs through Enumclaw and Greenwater on State Route 410. Airport pickup during weekday commuting periods can add substantial time before the mountain portion of the drive even begins.
How to Get to Mount Rainier from Portland or Yakima Airports
Portland International Airport is useful for travelers combining Mount Rainier with Mount St. Helens, the Columbia River Gorge, or Oregon. The drive to the Nisqually side is roughly 140 miles and usually takes about three hours before stops or congestion. Yakima Air Terminal is geographically convenient for Sunrise and the southeast side, but flight and rental-car choices are much more limited. East-side approaches also depend heavily on seasonal mountain highway conditions.
| Airport | Most convenient park side | Approximate driving distance | Planning consideration |
|---|---|---|---|
| Seattle-Tacoma International | Nisqually, Carbon River, Sunrise | About 85 to 110 miles | Best flight selection, but urban congestion can be significant |
| Portland International | Nisqually and Ohanapecosh | About 140 to 160 miles | Useful for a southern Washington road trip |
| Yakima Air Terminal | Sunrise and Ohanapecosh | About 90 to 110 miles | Limited flights and rental inventory |
How to Get to Mount Rainier National Park from Seattle or Tacoma
From central Seattle, allow roughly two and a half hours to reach Paradise under ordinary conditions, then add time for food, fuel, entrance lines, and slow park traffic. Tacoma is closer to the Nisqually corridor, but State Route 7 passes through several communities where traffic signals and weekend volume reduce average speeds. The final road above Longmire is winding, steep in places, and unsuitable for rushed driving.
For Sunrise, Seattle travelers commonly use State Route 410 through Enumclaw and Greenwater. This route follows the White River drainage before climbing toward the park. Sunrise Point provides an immediate sense of the terrain: pavement gives way to a broad volcanic panorama, cool wind moves across the exposed ridge, and Mount Rainier rises above the White River valley while the Cascades layer the eastern horizon. The elevation can feel markedly colder than the lowlands.
A Practical Departure Sequence
- Choose Paradise, Sunrise, Ohanapecosh, Carbon River, or Mowich Lake before selecting the driving route.
- Download the park map and the relevant highway map for offline use.
- Fuel the vehicle in a gateway community rather than expecting reliable fuel inside the park.
- Carry food and water, especially when heading to seasonal districts with limited services.
- Leave the metropolitan area before peak commuting traffic and reach popular trailheads early.
Why Seattle Traffic Changes the Calculation
Distance alone understates the trip. Interstate congestion near Seattle and Tacoma can delay the approach, while summer weekends create queues on the two-lane roads near park entrances. Returning west on Sunday afternoon can be equally slow. Staying near Ashford, Packwood, Enumclaw, or another gateway community allows an earlier start and removes the urban drive from the morning hiking schedule.
How Seasonal Roads Affect Getting to Mount Rainier
Snow controls access for much of the year. Paradise is the principal high-elevation destination with winter vehicle access, although storms, avalanche work, icy pavement, and staffing can delay or prevent entry. Sunrise, Stevens Canyon Road, White River Road, and Mowich Lake Road generally operate only during the snow-free season. Opening dates vary because crews must remove deep snow, repair winter damage, and prepare drainage systems.
Even in July, snow can remain on high trails such as Burroughs Mountain and Skyline. By October, early storms may affect roads above 5,000 feet while valleys remain wet rather than snowy. Drivers should carry warm layers, water, a windshield scraper outside midsummer, and approved traction equipment when required. Electric-vehicle drivers should identify charging locations before entering the mountain corridor because charging opportunities near remote park districts are limited.
How Getting to Mount Rainier Changes After Dark
Park roads have tight curves, steep drop-offs, limited lighting, and frequent wildlife movement. Black-tailed deer commonly appear near road edges, while fog can develop where moist Pacific air rises through forested valleys. A drive that feels straightforward in daylight becomes slower after sunset. Plan enough margin to descend before darkness, particularly after long hikes at Paradise, Sunrise, or Mowich Lake.
Getting Around Mount Rainier: Parking and Travel Between Districts
A search for How Get Mount Rainier often begins with highways, but the final few miles determine whether the day works. Parking fills first at concentrated destinations such as Paradise, Sunrise, and popular trailheads along the road. Arriving early reduces circling and roadside walking, while a weekday visit generally provides more flexibility. Never create a space on vegetation or beside a narrow curve, since improperly parked vehicles can block emergency access.
Changing districts during the same day consumes substantial time. Paradise and Sunrise sit on opposite sides of the volcano, and the drive between them follows winding park roads and state highways rather than a direct mountain crossing. A better plan groups Longmire with Paradise, White River with Sunrise, and Ohanapecosh with Stevens Canyon. Save Carbon River or Mowich Lake for a separate day because both require distinct northwest approaches.
Match the Vehicle to the Road
A standard passenger car handles the principal paved approaches when roads are open. Mowich Lake Road requires slower travel over gravel and washboard surfaces, so low-clearance vehicles need particular care around potholes and exposed rocks. Large recreational vehicles face tighter curves and fewer convenient turnaround points on mountain roads. Check vehicle length limitations before committing an RV or trailer to a campground approach.
Use Walking and Cycling Strategically
Once parked at Paradise or Sunrise, walking between nearby viewpoints is usually faster than moving the car repeatedly. At Carbon River, bicycles are useful on the former vehicle road because they shorten the approach to interior trail junctions, although riders must handle rough surfaces and yield to pedestrians. Bicycles are restricted on hiking trails, and riders should carry repair supplies because sharp gravel and debris can cause punctures far from the vehicle.
Choose a Realistic District Combination
| Areas to combine | Why the pairing works | Main complication |
|---|---|---|
| Longmire and Paradise | Both lie along the Nisqually corridor | Parking pressure increases higher on the road |
| Ohanapecosh and Stevens Canyon | Sites follow the southeast approach | The connecting road is seasonal |
| White River and Sunrise | Both use the northeast entrance corridor | High-elevation access closes with snow |
| Carbon River and Mowich Lake | Both begin from State Route 165 | The routes separate, and Mowich includes gravel |
Common Transportation Mistakes and Backup Plans
Ride-hailing services are unreliable as a primary park strategy. A driver may accept a trip from an airport or city, yet finding a return ride from a trailhead is far less certain because of weak mobile coverage and the long deadhead distance. Arrange any private transportation in advance, including the pickup place and time. Travelers without a vehicle should base themselves where a commercial tour or prearranged shuttle explicitly serves their intended district.
Navigation errors also occur when applications prioritize the shortest theoretical route. Minor forest roads can be rough, gated, snow-covered, or unsuitable for rental vehicles. Stay on the established state-highway approach associated with the chosen entrance. Save a screenshot of the return route, write down highway numbers, and note the last gateway community. These simple measures remain useful when a phone loses signal or battery power.
Prepare the Car Before Leaving Town
- Fill the fuel tank and check tire pressure, including the spare.
- Carry a charging cable, power bank, flashlight, and paper park map.
- Pack drinking water, food, warm layers, and rain protection inside the cabin.
- Bring traction equipment when seasonal rules or forecasts indicate winter driving.
- Keep rental documents and roadside-assistance information available offline.
Respond to a Closed Road Without Losing the Day
If access to Paradise is interrupted, Longmire and lower-elevation trails may provide alternatives without changing the entire approach. When Sunrise Road is unavailable, consider lower sites along the State Route 410 corridor rather than attempting a lengthy transfer to the south side. A Mowich Lake closure requires a different northwest plan because walking the full access road adds considerable mileage before the intended hike begins.
Leave Margin for the Return Trip
Set a turnaround time based on daylight, driving conditions, and the slowest member of the group. Hiking delays can place drivers on unfamiliar curves after dark, when fog, fatigue, and wildlife increase risk. Keep enough fuel to reach the gateway corridor even if a preferred station is closed. If the driver is exhausted, an additional night near the park is safer than forcing a late return to Seattle or Portland.
Build the Route Around One Side of the Mountain
The most dependable Mount Rainier trip starts with a named destination, then works outward to the correct entrance, gateway community, airport, and overnight base. Nisqually serves Longmire and Paradise, State Route 410 serves White River and Sunrise, State Route 123 reaches the southeast, and State Route 165 leads toward Carbon River and Mowich Lake. Treat those corridors as separate branches rather than interchangeable entrances.
Allow time for urban traffic, two-lane highways, entrance congestion, parking searches, weather, and slower mountain driving. Download maps, prepare the vehicle, group nearby sites, and keep a lower-elevation backup plan. With those decisions made before departure, the drive becomes a manageable part of the itinerary and leaves more of the day for Mount Rainier’s trails, forests, glaciers, and viewpoints.
Want to keep exploring? Browse all our Mount Rainier guides and articles for more trip-planning tips and ideas.
Gear & Essentials
Tell us about your trip and we will add what else you will want:
The basics
Worth having in the car whatever the park.
For this trip
Traveling with kids
Bringing a pet
RVing
Backcountry
Winter conditions
On the water
Photography
Accessibility
As an Amazon Associate we earn from qualifying purchases, at no extra cost to you.