How to Plan a Trip to Mount Rainier National Park
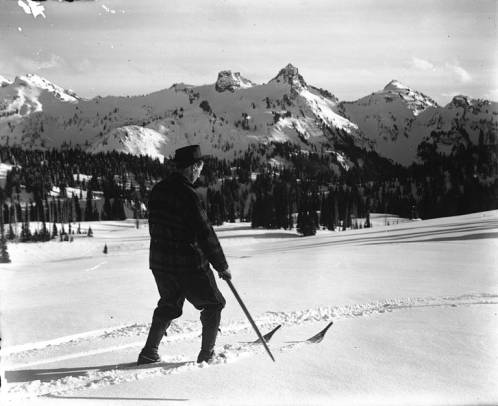
Photo: UW Digital Collections via Flickr (No known copyright restrictions)
Learning how to plan a trip to Mount Rainier National Park starts at dawn at Paradise, where boots scrape across gritty snow and the 14,410 foot summit turns pink above the Nisqually Glacier. Even in July, cold air can settle over the meadows before sunlight reaches the paved paths. The mountain fills so much of the southern sky that distances become difficult to judge, especially when lenticular clouds form above the crater rim.
That immense scale shapes every practical decision. Mount Rainier has several separate visitor areas, seasonal mountain roads, rapidly changing weather, and trailheads that can fill early. Our team recommends planning around one or two park regions per day rather than treating the park as a single roadside attraction. The first half of this guide explains how to choose those regions, select suitable dates, determine trip length, and build a realistic driving plan.
How to Plan a Trip to Mount Rainier National Park by Region
Mount Rainier is an active stratovolcano covered by 25 named glaciers. Deep river valleys radiate from the mountain, so roads circle its lower slopes rather than crossing the summit area. Paradise lies on the south side, Sunrise occupies the northeast, and Carbon River and Mowich Lake serve the northwest. Ohanapecosh provides access to the forested southeast. Driving between these areas often requires leaving the park or following slow, curving roads through steep terrain.
How Plan Trip Mount Rainier Days Around Paradise and Longmire
Paradise, at approximately 5,400 feet, is the park’s classic first stop. The Skyline Trail climbs through subalpine meadows toward Panorama Point, with a full loop of about 5.5 miles and roughly 1,700 feet of elevation gain. Below Paradise, Longmire sits near 2,760 feet among Douglas fir, western red cedar, and mineral springs. The Trail of the Shadows forms an easy 0.7 mile introduction to the area’s natural and early resort history.
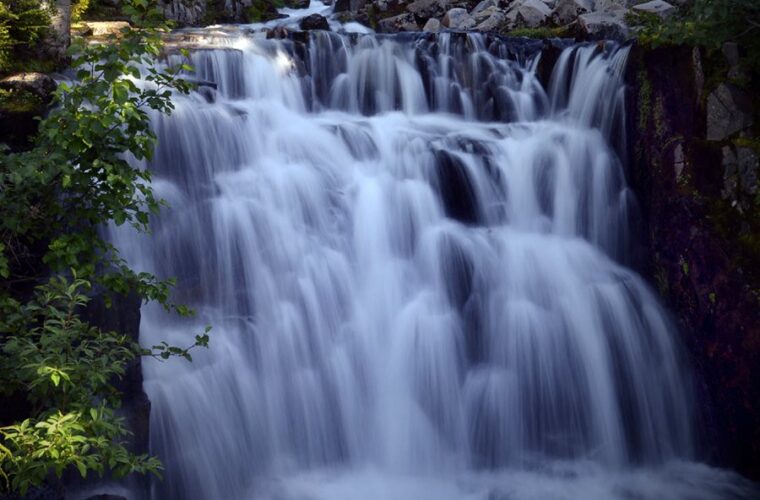
These two locations combine efficiently because they share the Nisqually Entrance corridor. Allow at least one full day if you want to hike above Paradise rather than photograph the mountain from roadside viewpoints. Narada Falls, Christine Falls, and Ricksecker Point can be added when roads and parking conditions permit. The Nisqually Glacier viewpoint on the Skyline route also reveals lateral moraines and exposed rock left behind as the glacier has retreated.
Compare Sunrise, Ohanapecosh, Carbon River, and Mowich Lake
Sunrise reaches about 6,400 feet, making it the highest point in the park accessible by vehicle. Trails begin directly in subalpine terrain, with options such as the 3.6 mile round trip to Frozen Lake and the longer Burroughs Mountain routes. Ohanapecosh sits much lower in old growth forest, while Carbon River receives heavy precipitation that supports a rare inland temperate rainforest. Mowich Lake provides access to Spray Park and the Wonderland Trail from a remote seasonal road.
| Area | Best suited to | Key outing | Planning constraint |
|---|---|---|---|
| Paradise | First visits, glaciers, wildflowers | Skyline Trail | Heavy demand and lingering snow |
| Sunrise | High elevation hiking and broad views | Burroughs Mountain | Shorter road season |
| Ohanapecosh | Old growth forest and waterfalls | Silver Falls loop | Far from Paradise by road |
| Carbon River | Rainforest walking and cycling access | Carbon River corridor | Vehicle access ends near the boundary |
| Mowich Lake | Backcountry style day hikes | Spray Park | Seasonal gravel approach |
Choose Dates That Match Your Priorities
Elevation creates several seasons within the same park. Low forests may be snow free while Paradise remains buried, and high trails can retain steep snowfields into July. Summer generally provides the broadest road and trail access, but it also brings the largest crowds. Autumn offers cooler hiking and changing huckleberry foliage, while winter concentrates recreation around snowshoeing, skiing, and lower elevation forest walks.
Use Snowpack, Wildflowers, and Visibility as Your Calendar
July and August usually provide the best chance of reaching high elevation trails without extensive snow travel. Paradise wildflowers commonly peak from late July into August, although timing shifts with the previous winter’s snowpack. Avalanche lilies appear soon after snowmelt, followed by lupine, paintbrush, bistort, and beargrass. September often brings clearer air and fewer insects, but the first substantial mountain snow can arrive before lower elevations experience winter conditions.
- Late spring: Choose waterfalls and low forest trails, and expect deep snow around Paradise and Sunrise.
- Mid to late summer: Prioritize high country hikes, wildflower meadows, and the widest selection of open roads.
- Early autumn: Plan for cold mornings, shorter daylight, and vivid subalpine foliage.
- Winter: Build the trip around snow travel skills, traction, and weather dependent road access.
Decide How Many Days You Actually Need
One day is enough for either Paradise and Longmire or Sunrise, but combining both creates a rushed itinerary dominated by driving and parking. Two days allow one southern day and one northeastern day. Three days create room for Ohanapecosh, a longer hike, or a weather backup. Four or more days suit hikers exploring Spray Park, the Burroughs, or separate Wonderland Trail segments without sacrificing time to recover from an obscured summit day.
- Choose one primary region for each day.
- Select one main hike and one short backup nearby.
- Reserve the clearest forecast day for exposed subalpine terrain.
- Keep a forest or waterfall itinerary available for cloudy weather.
How to Plan a Trip to Mount Rainier National Park by Entrance and Road
Most travelers arrive from Seattle, Tacoma, or Portland, but the best entrance depends on the day’s destination. From central Seattle, the Nisqually Entrance commonly requires about two to three hours before delays, while Sunrise is reached through the White River Entrance on the northeast side. Portland travelers often approach the southern side through communities along US 12 and state highways. Navigation apps can underestimate mountain driving because they do not fully reflect entrance queues, wildlife, construction, or narrow curves.
Match Each Entrance to the Correct Visitor Area
Use the Nisqually Entrance for Longmire and Paradise. Enter through White River for Sunrise, and use the Stevens Canyon Entrance for Ohanapecosh or the east side of Paradise when that seasonal road is open. Carbon River and Mowich Lake have separate approaches from the northwest. There is no quick internal road connecting every district, and the trip between Paradise and Sunrise can consume much of a day once stops and congestion are included.
Check Reservations, Road Status, and Vehicle Requirements
Entrance fees, timed entry programs, campground reservations, wilderness permits, road openings, and winter traction requirements can change by year or season. Confirm current details on the official park site before committing to lodging or a daily route. Download maps before leaving towns with reliable service, fill the fuel tank outside the park, and carry food and water for the day. Mountain weather can also close a road temporarily even after its seasonal opening date.
Pack for Rapid Changes in Elevation and Weather
A useful “How Plan Trip Mount Rainier” checklist begins with equipment for the highest point on your itinerary, rather than conditions at your lodging. Temperatures around Paradise and Sunrise can be substantially colder than at the entrances, while exposed ridges add wind chill and ultraviolet exposure. Carry every essential inside the vehicle because services are limited once you enter the park. Each hiker should have water, food, insulation, navigation, illumination, and basic first aid supplies.
Build a Layering System for the High Country
Start with a synthetic or wool base layer, add a fleece or light insulated jacket, and keep a waterproof shell immediately accessible. Cotton retains moisture and can become dangerously cold after rain or heavy sweating. A brimmed hat, sunglasses, and sunscreen matter on snow because reflected sunlight reaches the face from below. Trail runners work on dry maintained paths, but waterproof hiking footwear provides better protection where snowmelt, mud, and shallow stream crossings persist.
Match Traction to the Trail Surface
Early season snow can conceal trail junctions and create steep runouts above rocks or streams. Lightweight traction devices may help on firm, low angle snow, but they do not replace an ice axe or the training needed for consequential slopes. Turn around when a route exceeds your equipment or experience. Trekking poles improve balance on irregular snow and reduce strain during long descents from Panorama Point, Burroughs Mountain, or Spray Park.
| Expected condition | Useful equipment | Main planning concern |
|---|---|---|
| Persistent snow | Traction, poles, waterproof boots | Hidden trail and slippery traverses |
| Exposed summer trail | Sun protection, extra water, wind layer | Heat, glare, and limited shade |
| Cold rain or fog | Waterproof shell, warm layer, map | Hypothermia and poor visibility |
| Forest and river corridors | Insect repellent, dry socks, first aid kit | Mud, mosquitoes, and slick roots |
Carry Enough Water, Food, and Navigation Tools
Bring more water than you expect to drink, particularly on exposed routes above Sunrise where shade is scarce. Treat water collected from lakes or streams, including apparently clear glacial runoff. Pack calorie dense snacks that remain edible in cold weather, then reserve one portion for delays. Download an offline map and carry a paper backup. Phone batteries drain faster in cold conditions, and reception is unreliable throughout the park.
Use a Trailhead Departure Checklist
- Leave the route and expected return time with someone outside the hiking party.
- Photograph the trailhead map and note major junction names.
- Carry a headlamp even when planning to return before sunset.
- Store food securely and keep crumbs away from wildlife.
- Check each person for water, insulation, and rain protection.
Avoid the Mistakes That Disrupt Mount Rainier Itineraries
The most common planning error is tying the entire visit to a single exposed hike. Rainier creates its own cloud patterns, and the summit can disappear while nearby low elevation valleys remain usable. Set a turnaround time before leaving the trailhead, then keep a second outing within the same district. This approach prevents a delayed start, crowded parking area, or incoming storm from consuming the rest of the day.
Use Turnaround Rules Instead of Summit Fever
Thunder, rapidly thickening fog, unstable snow, and fast rising water all justify changing plans. Glacial rivers carry fine sediment and can rise during warm afternoons as meltwater increases. Never cross a flooded bridge approach or enter a closed area to preserve an itinerary. At higher elevations, headache, nausea, unusual fatigue, or poor coordination require rest and descent, especially when symptoms worsen rather than improve.
Give Wildlife Space
Black bears, mountain goats, marmots, and deer may appear close to busy trails. Do not approach them for photographs or allow animals to obtain food. Keep children close, control your pace around blind corners, and back away if an animal changes direction because of your presence. Foxes and birds that linger near parking areas may have learned to associate people with food, which makes careful storage particularly important.
Create a Weatherproof Backup Day
When clouds cover the upper mountain, shift to lower routes where forests provide shelter and shorter distances simplify navigation. The Grove of the Patriarchs vicinity, Silver Falls area, Trail of the Shadows, and Carbon River corridor illustrate old growth ecology without requiring summit visibility, although any closure must still be respected. Waterfalls often look strongest during wet periods, and forest trails avoid the exposure found on Burroughs Mountain or the upper Skyline Trail.
Respond to Smoke, Heat, or Heavy Rain
- During smoke, choose shorter outings and avoid strenuous climbs if air quality is poor.
- During heat, start early, carry additional water, and limit exposed afternoon hiking.
- During heavy rain, avoid river edges, steep snow, and trails with difficult creek crossings.
- If every safe option deteriorates, use the day for scenic driving, visitor exhibits, or rest.
Turn the Plan Into a Flexible Mount Rainier Trip
A strong itinerary assigns one region to each day, matches hikes to current snow and weather, and includes a nearby alternative. Pack for the elevation of the trail rather than the temperature at the park boundary. Early departures help, but sound decisions matter more than completing every stop. The mountain, glaciers, rivers, and forests will still provide a substantial day when the original objective becomes unsafe or impractical.
Before leaving home, finalize the entrance route, offline maps, fuel stop, lodging, and primary hike. Add one forest backup and establish a turnaround time for every longer trail. With those decisions settled, you can spend less time rerouting in parking areas and more time understanding Rainier’s volcanic terrain, receding glaciers, old growth valleys, and sharply changing subalpine environment.
Want to keep exploring? Browse all our Mount Rainier guides and articles for more trip-planning tips and ideas.
Gear & Essentials
Tell us about your trip and we will add what else you will want:
The basics
Worth having in the car whatever the park.
For this trip
Traveling with kids
Bringing a pet
RVing
Backcountry
Winter conditions
On the water
Photography
Accessibility
As an Amazon Associate we earn from qualifying purchases, at no extra cost to you.