



Zion National Park: The Perfect 3-Day Itinerary
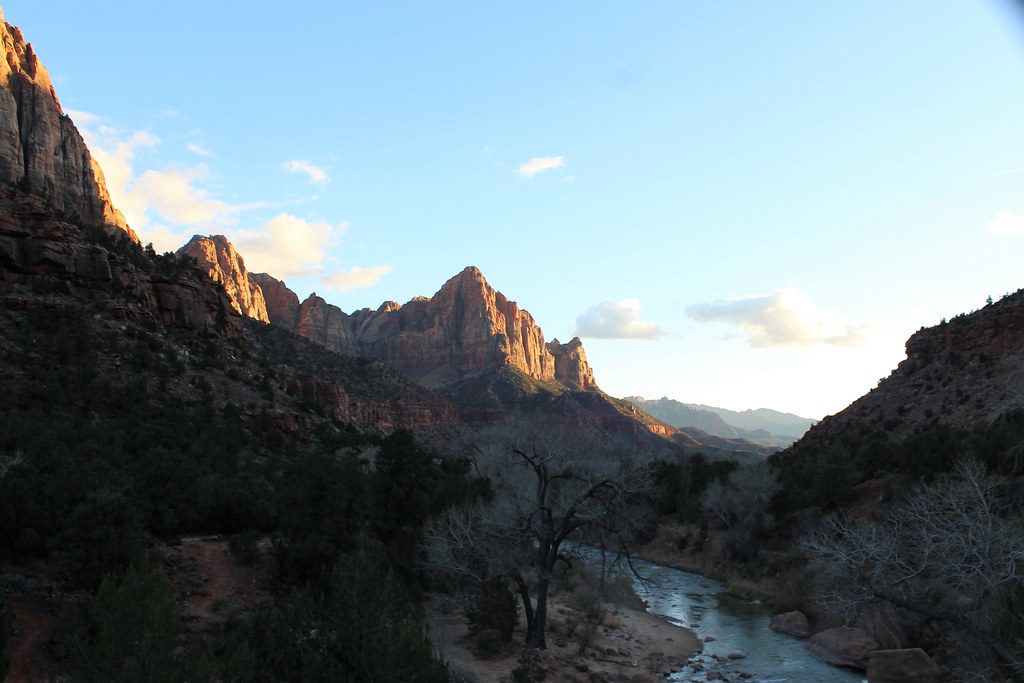
Photo: agcaddesigns.com Architectural Renderings via Flickr (CC BY 2.0)
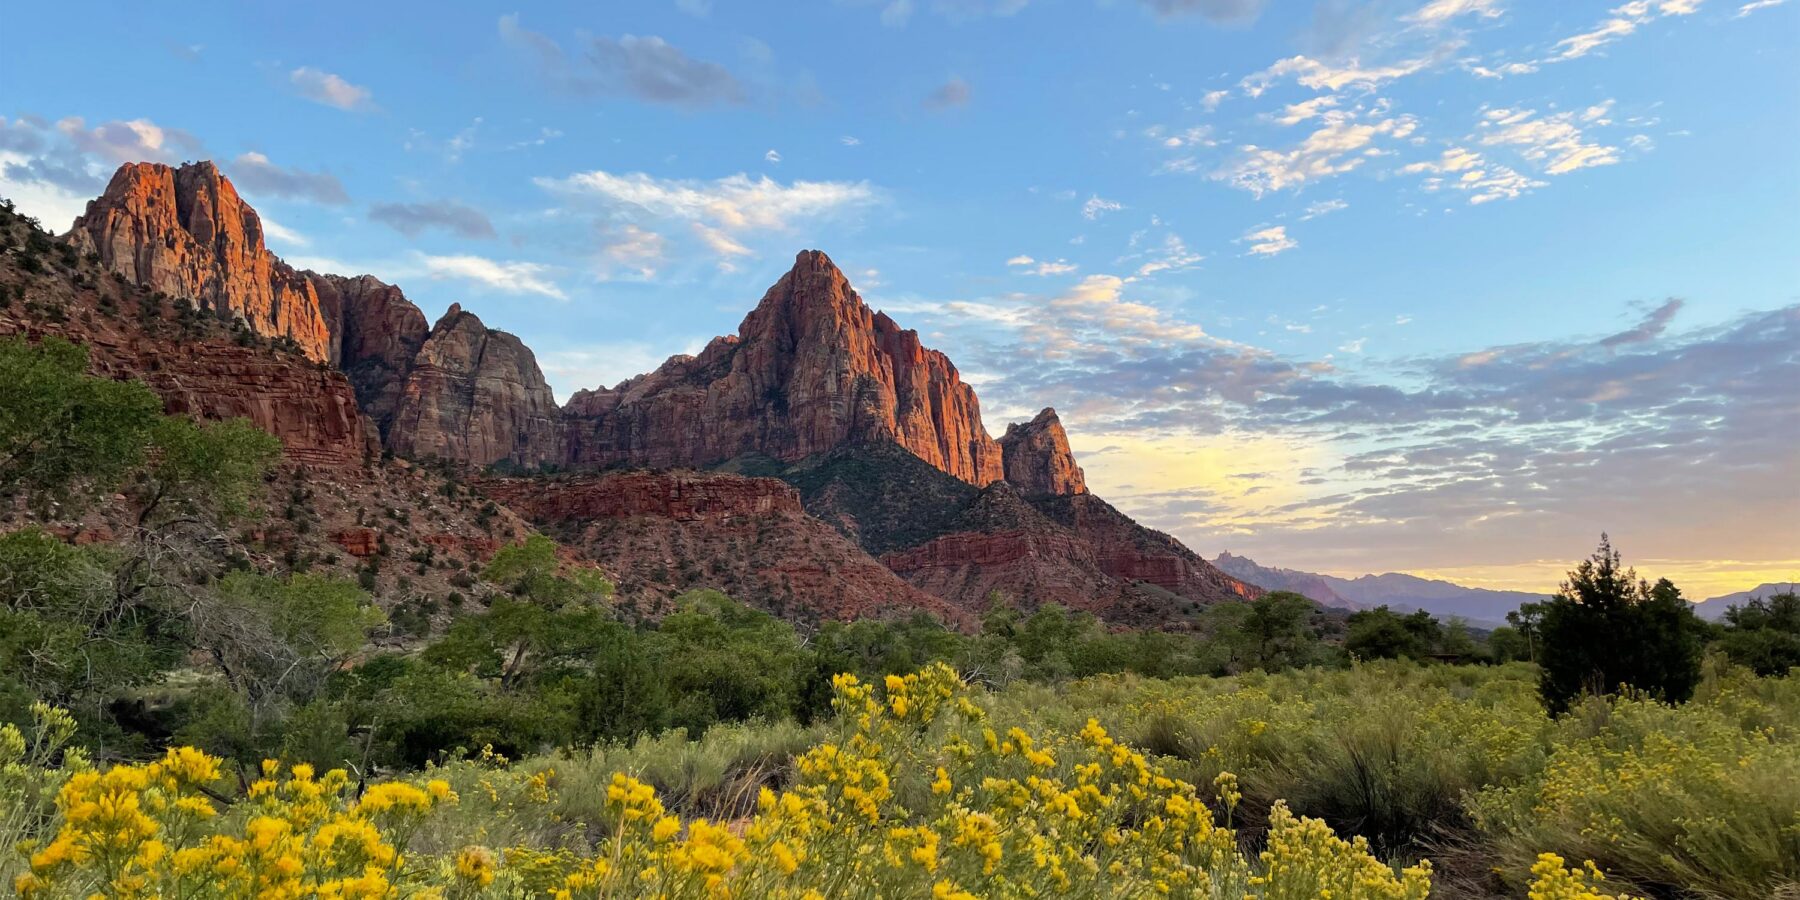
We designed this Zion National Park Perfect 3-day itinerary around the park’s defining landscape: Zion Canyon, a narrow corridor enclosed by Navajo Sandstone walls that rise roughly 2,000 feet above the Virgin River. Three days allow enough time for the Narrows, the viewpoints around Angels Landing, the east side’s slickrock, and several shorter trails without forcing every major hike into one exhausting day.
The order below separates water hiking, high exposed terrain, and scenic driving. It also accounts for Zion’s unusual transportation pattern. For much of the busy season, visitors reach the main canyon’s trailheads by shuttle, while the Zion Mount Carmel Highway remains the practical route to Canyon Overlook and the east entrance. Our plan uses Springdale or the park’s south entrance area as a base, limiting daily packing and unnecessary driving.
Why This Route Creates the Perfect 3-Day Zion National Park Itinerary
Zion covers nearly 150,000 acres, but its headline destinations are concentrated in several distinct areas. Zion Canyon contains the Narrows, Emerald Pools, Angels Landing, and the Court of the Patriarchs. The east side has Checkerboard Mesa, Canyon Overlook, and pale slickrock formations. Kolob Canyons lies about 40 road miles north of Zion Canyon beside Interstate 15, making it a poor fit for a first visit unless weather closes another part of the plan.
Base all three nights near the south entrance
Springdale sits directly outside Zion’s pedestrian entrance and offers the easiest access to the canyon transportation system. Staying here or inside the park removes the need to search for parking each morning. Lodging farther west around Rockville, Virgin, or La Verkin can cost less, but it adds driving and makes an early trail start harder. Changing accommodations offers little benefit because all three days return through Zion Canyon or the south entrance.
Move from orientation to demanding hikes
Day one uses the Zion Mount Carmel Highway and moderate trails to introduce the canyon’s scale. Day two is reserved for the Narrows, where cold water, slippery footing, and changing flow conditions demand attention. Day three visits Scout Lookout, Angels Landing if permitted, or the West Rim Trail. This sequence keeps the two most strenuous outings on separate days and leaves room to change their order if storms threaten the river or exposed ridges.
Zion National Park: The Perfect 3-Day Itinerary at a Glance
The schedule assumes three full sightseeing days and lodging near the south entrance. Drive times are approximate and can expand when parking areas fill, wildlife enters the road, or oversized vehicles move through the Zion Mount Carmel Tunnel. Shuttle travel inside Zion Canyon depends on boarding lines and the number of stops, so treat those portions as transit blocks rather than fixed appointments.
| Day | Main stops | Primary highlight | Approximate road time |
|---|---|---|---|
| 1 | Zion Mount Carmel Highway, Canyon Overlook, Pa’rus Trail | Sandstone geology and first canyon views | 35 to 45 minutes from Springdale to the east entrance |
| 2 | Temple of Sinawava, Riverside Walk, the Narrows | Walking through the Virgin River gorge | Minimal driving, plus canyon shuttle transit |
| 3 | The Grotto, Scout Lookout, West Rim Trail, Emerald Pools | High views over Zion Canyon | Minimal driving, plus canyon shuttle transit |
Must-do experiences and flexible additions
Protect the Narrows and West Rim days when conditions allow. Canyon Overlook is the essential east-side stop because its one-mile round trip reaches a broad view above Pine Creek Canyon with relatively little hiking. Pa’rus Trail and Emerald Pools are easier to move, shorten, or omit. The Pa’rus Trail is especially useful on arrival day because its broad views improve toward sunset and its paved alignment follows the Virgin River near the canyon floor.
- Highest priorities: Canyon Overlook, the Narrows, and Scout Lookout or the upper West Rim Trail.
- Weather-dependent: the Narrows during runoff or storms, and exposed ridges during lightning, snow, or strong wind.
- Optional additions: Emerald Pools, Court of the Patriarchs, Checkerboard Mesa, and Watchman Trail.
- First places to cut: distant Kolob Canyons and lengthy restaurant stops during daylight hours.
Logistics That Determine Whether the Plan Works
Zion Canyon’s road system requires more planning than its compact map suggests. Private vehicle access to the scenic drive is commonly restricted when the canyon shuttle operates. Visitors then board near the visitor center or enter from Springdale on foot. Current shuttle dates, trail closures, entrance requirements, permits, and river conditions can change, so confirm details on the official park site before fixing the day order.
Food, fuel, water, and connectivity
Fill the fuel tank before entering the park because there are no public gas stations inside Zion. Springdale has markets, cafes, and takeout options, but buying breakfast and trail food the evening before protects an early start. Carry more drinking water than a cool morning seems to require. Canyon temperatures can climb rapidly, and the dry air masks sweat. Mobile service becomes unreliable beyond developed areas, so download maps and reservation details before entering the canyon.
What to carry each day
Each outing needs sun protection, a headlamp, salty snacks, and layers suited to the elevation. The visitor center is near 4,000 feet, while higher West Rim terrain exceeds 6,000 feet and can be substantially cooler. For the Narrows, use footwear with secure traction and avoid cotton insulation. A sturdy walking stick helps on submerged cobbles. Dry bags protect electronics, but they do not make hazardous river conditions safe.
- Download offline maps and save permit information.
- Pack lunch before the morning shuttle queue develops.
- Carry a warm layer even when Springdale feels mild.
- Check river flow, flash-flood potential, trail status, and the hourly forecast.
- Tell someone which major trail you intend to hike.
Build safety decisions into the itinerary
Flash floods can move through the Narrows even when the sky overhead appears clear because the drainage extends far upstream. Angels Landing adds narrow exposure and steep drop-offs, while summer heat raises dehydration risk on the West Rim’s sustained climb. Turnaround decisions belong in the morning plan, not after conditions deteriorate. Our report on a visitor fatality at Zion National Park also underscores why route choice, weather checks, and conservative pacing matter.
Day 1 of Zion National Park: The Perfect 3-Day Itinerary
Use the first day for the Zion Mount Carmel Highway, Canyon Overlook, and a lower-canyon walk. Starting on the east side avoids combining a driving day with shuttle-dependent trailheads. It also reveals the park’s geology in sequence, from the deeply cut main canyon through the tunnel to rounded domes, cross-bedded sandstone, and scattered ponderosa pines on the higher plateau.
Drive the Zion Mount Carmel Highway
From Springdale, Route 9 climbs past the Great Arch and enters the 1.1-mile Zion Mount Carmel Tunnel, completed in 1930. The tunnel passes through solid Navajo Sandstone and emerges into terrain that looks markedly different from Zion Canyon. Watch for Checkerboard Mesa near the east entrance, where horizontal sediment layers intersect vertical weathering cracks. Bighorn sheep are sometimes visible on nearby slopes, especially during quieter morning hours.
Hike Canyon Overlook early
The Canyon Overlook Trail begins near the tunnel’s east portal and covers about one mile round trip. The route crosses uneven sandstone, includes protected drop-offs, and gains roughly 160 feet. Parking is limited, so arrive early and skip the stop if no legal space is available. Allow about an hour for the walk and viewpoint, longer if the trail is crowded.
Near the overlook, sandstone feels gritty beneath your shoes and the shaded alcoves can remain cool while sunlit ledges radiate heat. The final turn opens abruptly above Pine Creek Canyon. Bridge Mountain fills the opposite skyline, switchbacks appear far below, and the canyon walls reveal their scale through tiny vehicles moving toward the tunnel.
Finish beside the Virgin River
Return toward the south entrance for the Pa’rus Trail, a paved route of about 3.5 miles round trip between the visitor center area and Canyon Junction. The path crosses the Virgin River several times and gives clear views toward the Watchman, a 6,545-foot sandstone summit. Walk only part of it if daylight is limited. Late afternoon offers softer light on the walls, while the open corridor provides little protection from summer heat.
Day 2: Follow the Virgin River into the Narrows
Board an early canyon shuttle to the Temple of Sinawava, the final stop on Zion Canyon Scenic Drive. The Narrows begins after the Riverside Walk, so every hiker first covers this paved 2.2-mile round trip beside the Virgin River. Starting early reduces crowding and gives you time to assess water temperature, current strength, and footing before committing to several hours in the gorge. Sleep at the same south-entrance base afterward, with dry footwear ready for day three.
Enter the river and work toward Wall Street
Once the constructed trail ends, progress becomes slower than mileage suggests. Most hikers travel one to three miles upstream before turning around. Orderville Canyon enters from the right roughly 1.5 miles above the Riverside Walk, followed by Wall Street, where the gorge narrows and sandstone walls rise nearly vertically overhead. Expect repeated crossings, ankle-to-knee-deep water, and submerged rocks that shift underfoot. The return usually moves faster with the current, but tired legs make slips more likely.
Choose a turnaround before fatigue decides for you
Big Springs marks the upstream limit for a bottom-up day hike and creates a journey of roughly 9.4 miles from the Temple of Sinawava, excluding the Riverside Walk approach. Few three-day visitors need to go that far. Wall Street provides the characteristic Narrows experience with a more manageable time commitment. Turn around earlier when water reaches above the waist, footing becomes unstable, or cold begins affecting coordination. Save enough energy for the paved walk back to the shuttle.
Day 3: Climb Above Zion Canyon
Use the final morning for the West Rim Trail from the Grotto. Scout Lookout is approximately 3.6 miles round trip with about 1,100 feet of elevation gain. The route crosses the Virgin River, climbs through Refrigerator Canyon, and ascends Walter’s Wiggles, a compact series of 21 switchbacks built into the sandstone. Begin early because much of the climb receives direct sun later in the day, particularly from late spring through early fall.
Reach Scout Lookout at a sustainable pace
Refrigerator Canyon provides the last sustained shade before the switchbacks. At Scout Lookout, the trail reaches a broad saddle above Zion Canyon with views toward Angels Landing, the Great White Throne, and the canyon floor. This is the correct destination for hikers uncomfortable with severe exposure. Loose sand over rock can make the descent slippery, so trekking poles help even though the return is entirely downhill.
Choose the chains or continue on the West Rim
Angels Landing’s final half-mile follows a narrow fin with fixed chains and long drop-offs. Hike it only with the required authorization and suitable weather. A strong alternative continues north on the West Rim Trail, climbing above Scout Lookout toward higher viewpoints without entering the chain section. After descending, add the Kayenta Trail toward Emerald Pools if energy and daylight remain. Otherwise, return to the Grotto and use the afternoon for a meal, recovery, and the trip back to your lodging.
Adjusting the Three Days for Zion’s Seasons
A Zion National Park Perfect schedule needs flexible day assignments because river flow, heat, ice, and thunderstorms affect different routes in different ways. Spring snowmelt can make the Narrows unavailable while leaving lower canyon trails comfortable. Summer favors very early starts but brings dangerous afternoon heat and monsoon storms. Autumn commonly delivers cooler hiking temperatures, while winter may place ice on Canyon Overlook, Walter’s Wiggles, and shaded sections of the West Rim Trail.
Match the main objective to expected conditions
| Season | Likely conditions | Best adjustment |
|---|---|---|
| Spring | Cold water, snowmelt, variable high-elevation footing | Replace the Narrows with Watchman Trail or additional east-side hiking when river conditions prevent entry |
| Summer | Intense canyon heat and possible afternoon thunderstorms | Start West Rim before sunrise and schedule exposed walks for morning |
| Autumn | Cooler mornings and progressively colder river water | Carry insulation for the Narrows and keep the original order flexible |
| Winter | Short daylight, ice, snow, and reduced sun in narrow canyons | Favor lower trails and carry traction when frozen surfaces are present |
Use practical substitutions rather than forcing a closure
When one major hike becomes unsuitable, replace it with terrain affected by a different hazard. The Watchman Trail covers about 3.3 miles round trip and gains roughly 370 feet above the visitor center area. East-side walks offer open slickrock but can still hold ice in shaded pockets. Kolob Canyons becomes reasonable only when an entire day opens in the schedule, since the separate entrance requires substantial additional driving.
- If the Narrows is unavailable: combine Watchman Trail with Emerald Pools and a longer Pa’rus Trail walk.
- If exposed ridges are unsafe: remain on the canyon floor and explore Riverside Walk or the lower pool routes.
- If extreme heat develops: shorten the afternoon, seek shaded trails, and move strenuous climbing to the next morning.
Completing Your Perfect 3-Day Zion National Park Itinerary
This itinerary places the east-side drive first, the Narrows second, and the West Rim climb last. That order introduces Zion’s geology before committing to its two demanding environments: moving water and exposed elevation. Keeping one lodging base near the south entrance also simplifies meals, shuttle access, and early departures. Canyon Overlook, Wall Street, and Scout Lookout provide three distinct perspectives without spending the trip moving between hotels.
Treat the daily order as adjustable rather than fixed. Review the river, weather, and trail information each evening, then protect the safest window for the following day’s primary objective. With food packed, maps downloaded, and realistic turnaround points established, three full days are enough to experience Zion Canyon’s river corridor, high sandstone rims, and sculpted east-side terrain at a responsible pace.
Want to keep exploring? Browse all our Zion guides and articles for more trip-planning tips and ideas.
Gear & Essentials
Tell us about your trip and we will add what else you will want:
The basics
Worth having in the car whatever the park.
For this trip
Traveling with kids
Bringing a pet
RVing
Backcountry
Winter conditions
On the water
Photography
Accessibility
As an Amazon Associate we earn from qualifying purchases, at no extra cost to you.