
Visiting Zion National Park with Limited Mobility: Accessible Views and Trails
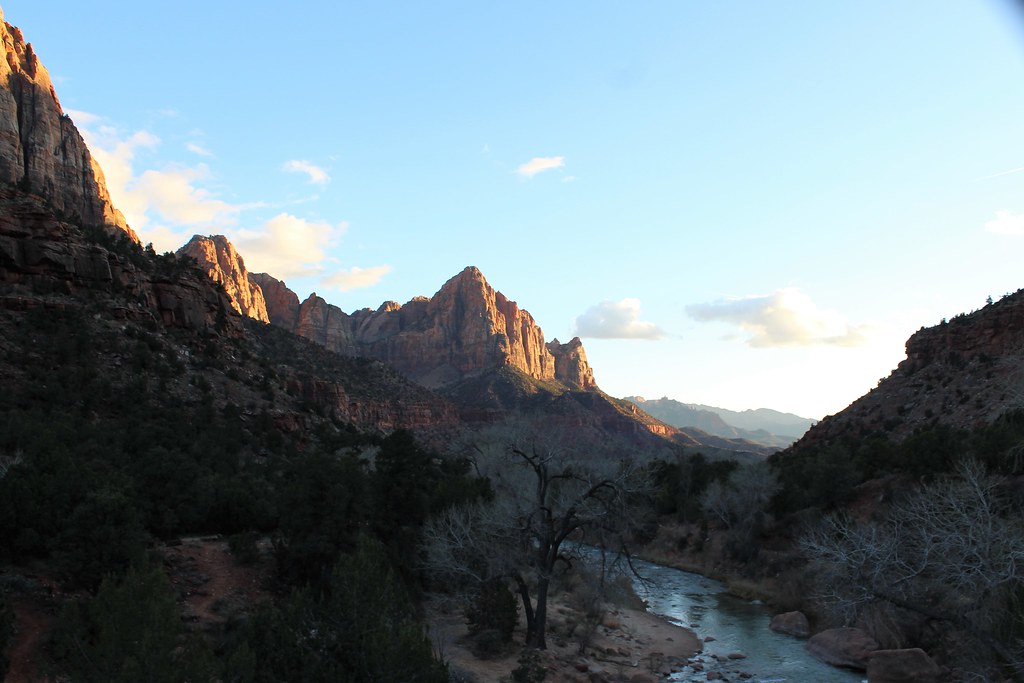
Photo: agcaddesigns.com Architectural Renderings via Flickr (CC BY 2.0)
Visiting Zion National Park with limited mobility works best when you treat the park as a series of scenic corridors rather than a collection of summit hikes. Zion Canyon’s floor sits near 4,000 feet, while Navajo Sandstone walls rise roughly 2,000 to 3,000 feet above the road. Several of the strongest views are available from paved paths, shuttle stops, museum grounds, and roadside pullouts, often without climbing steps or crossing rough terrain.
Our team recommends concentrating first on Zion Canyon, where the Pa’rus Trail, Canyon Junction, Big Bend, and Temple of Sinawava provide close views of the Virgin River and the park’s largest monoliths. The Zion Mount Carmel Highway adds high-desert scenery from the car, while Kolob Canyons provides a quieter drive through parallel red-rock canyons. This guide explains how those areas fit together and which surfaces, grades, transportation constraints, and seasonal conditions matter most.
Planning for Visiting Zion National Park with Limited Mobility
Zion’s main visitor areas are separated by both distance and elevation. Zion Canyon begins near the visitor center outside Springdale and runs north for about 7 miles to the Temple of Sinawava. The Zion Mount Carmel Highway climbs east through switchbacks and a historic 1.1-mile tunnel, eventually reaching slickrock country around Checkerboard Mesa. Kolob Canyons has a separate entrance off Interstate 15, roughly 40 miles by road from Zion Canyon.
How the canyon shuttle affects an accessible itinerary
During the main visitor season, Zion Canyon Scenic Drive is generally served by park shuttle buses, and most private vehicles cannot continue beyond Canyon Junction. The buses typically accommodate wheelchairs, although lift dimensions, combined weight limits, temporary stop closures, operating dates, parking arrangements, and vehicle access policies can affect individual plans. Confirm current accessibility details, shuttle operations, entrance fees, and required permits on the official park site before traveling.
Where to begin your day
The Zion Canyon Visitor Center area is the most practical starting point because it connects the shuttle system, Pa’rus Trail, park information, and Springdale pedestrian entrance. Arrive early enough to avoid crossing a large parking area during the hottest part of the day. Travelers using mobility devices should inspect tire pressure, battery charge, and brake function before entering the canyon, where direct sun and long waits can increase fatigue.
- Bring water from the start: Zion’s low elevation, dry air, and reflected sandstone heat can cause dehydration before thirst becomes obvious.
- Carry sun protection: Shade is intermittent along paved paths and at exposed shuttle stops.
- Pack a light layer: Canyon shade can feel cool in the morning, even when afternoon temperatures become hot.
- Use a compact seat if appropriate: Benches are unevenly spaced, and a shuttle queue may require standing.
- Keep medication accessible: Do not place essential medication where it is difficult to reach while seated.
Accessible Views When Visiting Zion National Park
Zion Canyon contains the park’s greatest concentration of low-effort viewpoints. The Virgin River established the canyon’s course, while flash floods, rockfall, and groundwater continue widening it. Above the reddish Kayenta Formation, the pale Navajo Sandstone forms cliffs such as the Great White Throne, which reaches 6,744 feet. Cottonwoods and box elders line the river, contrasting with pinyon pine, juniper, yucca, and cactus on drier slopes.
Visiting Zion National Park: Accessibility on the Pa’rus Trail
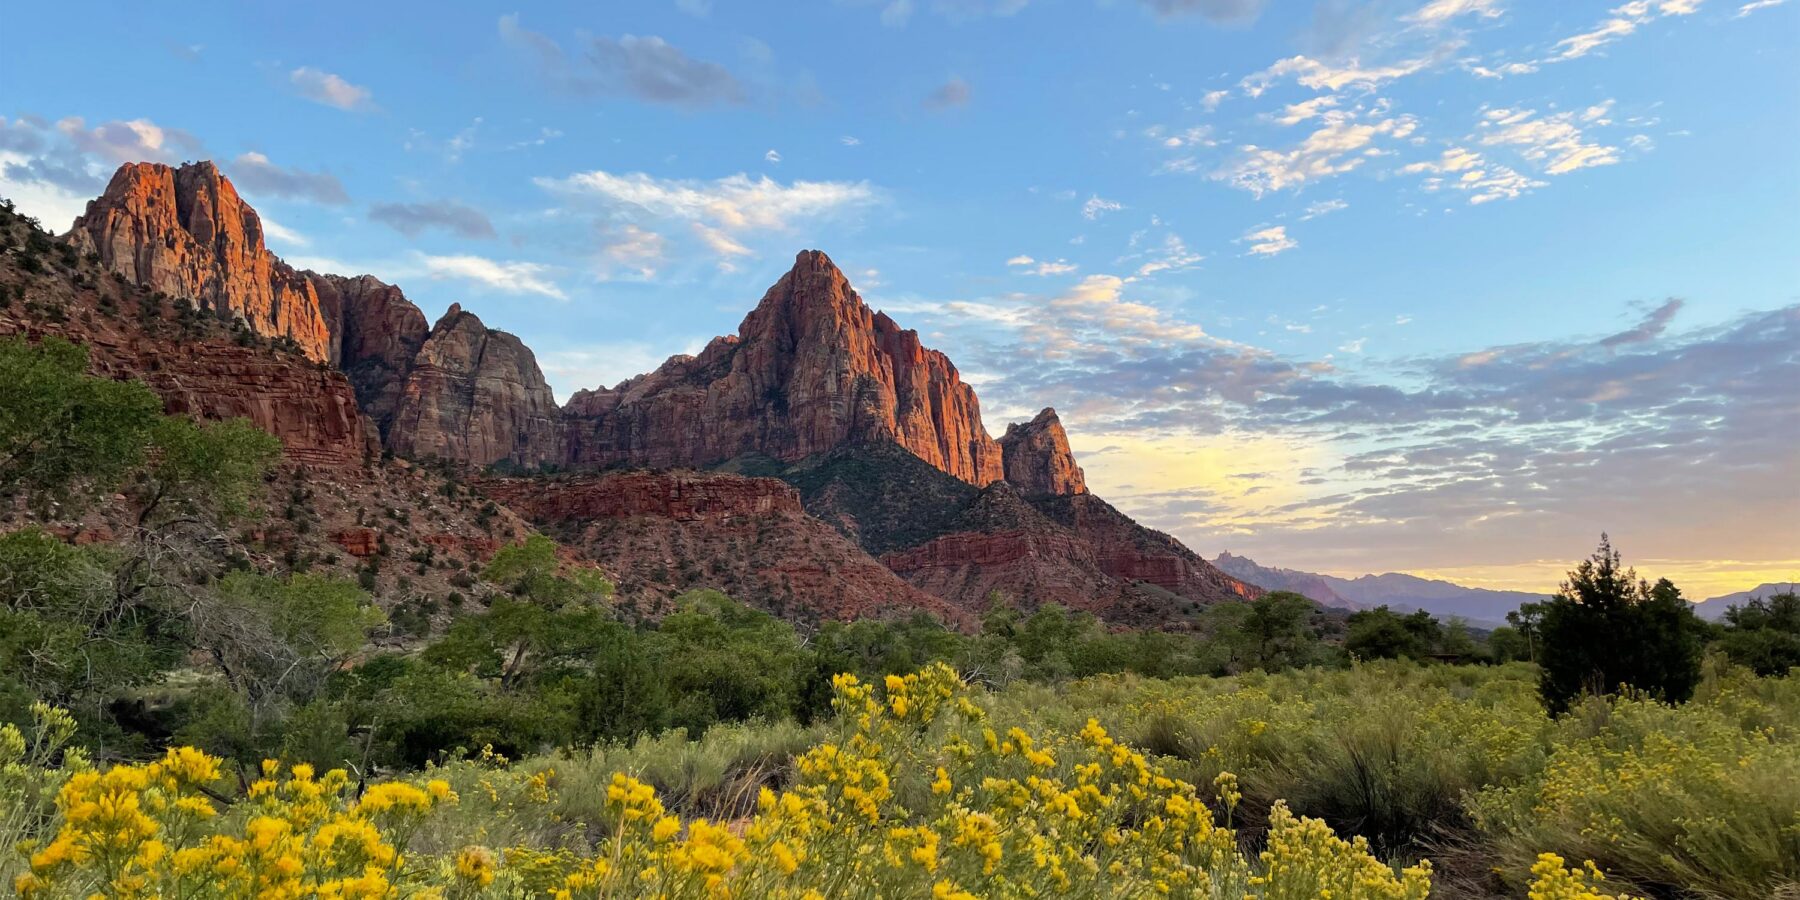
The paved Pa’rus Trail runs approximately 1.75 miles each way between the visitor center area and Canyon Junction, with about 50 feet of total elevation change. It follows the Virgin River across several bridges and provides broad views toward the Watchman, a 6,545-foot sandstone summit. Although the route is among Zion’s most mobility-friendly trails, short grades, joints in the pavement, sand, and heat may require assistance for some wheelchair users.
What the trail feels like near Canyon Junction
Near sunset, the pavement retains the day’s warmth while cooler air settles beside the river. Cottonwood leaves rattle overhead, shuttle noise fades between passing buses, and the Watchman appears abruptly beyond the open river corridor. The view develops gradually rather than from a single platform, so travelers can turn around whenever distance or fatigue becomes a concern. Late light reaches the cliffs before it reaches the shaded trail, creating a strong view without requiring a climb.
Big Bend and the Temple of Sinawava
Big Bend sits beneath the Great White Throne and offers one of the canyon’s widest upward views directly from the shuttle stop area. It is useful for visitors who cannot manage a trail but still want to experience the canyon’s vertical scale. Farther north, the Temple of Sinawava forms the end of the scenic drive, where the canyon narrows, hanging gardens appear on wet rock, and the Riverside Walk begins beside the Virgin River.
Riverside Walk limitations
The Riverside Walk is paved for roughly 1.1 miles each way and gains about 57 feet, but “paved” does not mean uniformly easy. Some sections have steeper grades, uneven edges, sand, wet patches, and exposure beside drop-offs. Wheelchair users may need assistance, particularly after storms or where debris crosses the path. Even a short out-and-back from the Temple of Sinawava provides access to cooler air, spring-fed vegetation, and narrowing canyon walls.
| Location | Distance | Surface | Mobility considerations |
|---|---|---|---|
| Pa’rus Trail | About 3.5 miles round trip | Paved | Gentle overall profile with short grades and exposed sections |
| Big Bend | View from shuttle stop area | Paved roadside area | Strong cliff views with minimal travel from the bus |
| Temple of Sinawava | View from final canyon stop | Paved plaza and path connections | Useful destination even without completing Riverside Walk |
| Riverside Walk | About 2.2 miles round trip | Paved | Assistance may be needed for grades, sand, and uneven sections |
Scenic Stops Outside the Shuttle Corridor
Travelers with limited mobility should reserve time for areas reached by private vehicle. These routes reduce transfers and allow flexible stops, although roadside shoulders and pullouts vary considerably. The Zion Mount Carmel Highway reveals the park’s upper sandstone layers, while Kolob Canyons exposes a separate line of deep finger canyons. Both areas feel geologically connected to Zion Canyon but differ in vegetation, elevation, and crowd patterns.
The Zion Mount Carmel Highway
East of Canyon Junction, the highway climbs steep switchbacks toward the Zion Mount Carmel Tunnel, completed in 1930. Gallery windows cut into the tunnel wall provide brief framed views, but stopping inside is prohibited. Beyond the tunnel, the landscape changes from sheer canyon walls to rounded domes, cross-bedded sandstone, and shallow drainages. Roadside pullouts near Checkerboard Mesa allow viewing from or close to a vehicle, though curbs, gravel, and uneven shoulders can limit wheelchair movement.
Kolob Canyons for a quieter scenic drive
Kolob Canyons occupies Zion’s northwestern corner and is reached separately from Interstate 15. Its scenic road climbs into higher, cooler terrain overlooking red Navajo Sandstone fins and box canyons. Roadside overlooks provide the principal accessible experience because trails such as Timber Creek Overlook use natural surfaces. Winter snow and ice can linger here after lower Zion Canyon has cleared, while summer afternoons may bring thunderstorms and lightning to exposed viewpoints.
Choosing the Best Conditions for Visiting Zion National Park
Season changes accessibility as much as distance does. Spring brings comfortable temperatures at lower elevations, but snowmelt, rain, and construction debris can affect paved surfaces. Summer produces intense heat on the Pa’rus Trail and at open pullouts, with temperatures commonly highest from late morning through afternoon. Autumn usually brings cooler walking conditions, while winter offers lighter visitation but introduces ice, shortened daylight, and possible snow on the east side and at Kolob Canyons.
Matching the route to heat, shade, and endurance
On hot days, start with Pa’rus Trail or the exposed east-side viewpoints early, then use the shaded canyon corridor later. The Riverside Walk is cooler because high walls restrict direct sunlight, though that shade can preserve ice in winter. Wind also matters: strong canyon gusts can make balance difficult for visitors using canes or walkers, and they increase resistance for manual wheelchair users crossing open bridges.
A practical first-day sequence
- Begin at the visitor center area and assess the Pa’rus Trail’s pavement, temperature, and grades.
- Use the canyon shuttle to reach Big Bend for a low-effort view of the Great White Throne.
- Continue to the Temple of Sinawava and decide on the Riverside Walk after inspecting the initial slope and surface.
- Return before fatigue makes transfers more difficult, then drive the Zion Mount Carmel Highway if daylight and energy permit.
Low Effort Stops That Many Visitors Pass By
Several worthwhile canyon stops require less movement than the better-known trails. They also work well as recovery periods between shuttle transfers. Court of the Patriarchs and the Zion Human History Museum area provide distinct perspectives on the canyon’s geology, with enough visual context to understand how individual formations fit together. At both locations, the strongest views are available before committing to a longer path.
Court of the Patriarchs from the canyon floor
The peaks named Abraham, Isaac, and Jacob rise west of the scenic drive, with Mount Moroni standing nearby. A short trail climbs from the shuttle stop to a formal viewpoint, but its slope can be difficult for wheelchair users and people with limited balance. The canyon floor near the stop still provides a clear look upward. Morning light generally defines the sandstone faces better than the deep shade that develops later.
Museum grounds and the Towers of the Virgin
The Zion Human History Museum area faces the Towers of the Virgin, including the Sundial, Witch Head, Broken Tooth, and Altar of Sacrifice. The broad foreground makes this one of the easier places to understand the cliffs’ scale without craning directly overhead. Exhibits inside explain Southern Paiute connections to the landscape, pioneer settlement, water, and park development. Availability of individual exhibits or programs may vary, but the exterior panorama remains valuable.
Build an Itinerary Around Transfers and Recovery Time
Visitors often evaluate a route by walking distance alone, yet repeated standing, boarding, turning, and repositioning can consume more energy than a continuous paved path. When Visiting Zion National Park, count each shuttle transfer as part of the day’s physical workload. A shorter itinerary with two carefully selected stops may provide more time beneath the cliffs and less time managing equipment in crowded boarding areas.
Choose a plan that matches your mobility pattern
A manual wheelchair user may prefer the Pa’rus Trail’s continuous surface over frequent shuttle transfers. Someone who can walk short distances but tires quickly may get more from Big Bend, Court of the Patriarchs, and the Temple of Sinawava. Visitors sensitive to heat should prioritize shaded canyon stops, while travelers who need immediate vehicle access may favor the east highway and Kolob Canyons.
| Priority | Best fit | Main challenge |
|---|---|---|
| Fewest transfers | Pa’rus Trail and museum area | Sun exposure |
| Shortest movement | Big Bend and Court of the Patriarchs | Shuttle boarding |
| Private vehicle access | East highway and Kolob Canyons | Uneven pullouts |
| Cooler canyon setting | Temple of Sinawava | Crowds and variable trail grades |
Protect energy for the return trip
Turn around before reaching half of your usable energy, particularly on the Riverside Walk, where the return follows the same gently descending and climbing pavement. Schedule seated recovery before boarding another shuttle. A practical mobility plan should include the following:
- A turnaround time based on heat and fatigue
- Extra battery capacity for powered equipment
- A companion plan for ramps, doors, and loose sand
- Water that can be reached without unpacking gear
- An alternate roadside stop if a trail proves unsuitable
Prepare for Zion’s Less Obvious Hazards
Zion’s paved areas remain part of an active desert canyon. Sand washes across paths, cottonwood roots lift pavement, and rain carries gravel onto curb cuts and ramps. Rockfall can occur beneath steep cliffs without warning. After storms, inspect the first section of any route before proceeding. Narrow wheelchair tires and small walker wheels are especially vulnerable where sand accumulates along pavement edges.
Flash floods and changing river conditions
Thunderstorms many miles upstream can raise the Virgin River and its tributaries quickly. The Riverside Walk stays above the river in many places, but access points, low edges, and nearby drainages can become hazardous. Never enter a signed closure or cross flowing water over pavement. Darkening water, floating debris, a sudden increase in sound, or rapid water rise are signals to move toward higher ground immediately.
Wildlife near developed areas
Mule deer and wild turkeys regularly cross roads and paths on the canyon floor, particularly near dawn and evening. Desert bighorn sheep are more often seen on the east side, where their tan coats blend into slickrock. Give every animal room and keep food secured. Visitors traveling with service animals should remain especially alert near deer, sheep, and squirrels, since close encounters can provoke defensive behavior.
Make Visiting Zion National Park Work for Your Mobility Needs
A successful limited-mobility visit comes from matching Zion’s separate corridors to personal endurance. Use the canyon shuttle for close views of the Great White Throne and the Temple of Sinawava, choose Pa’rus Trail for a longer paved experience, and reserve private-vehicle time for Checkerboard Mesa or Kolob Canyons. These options reveal river habitat, towering Navajo Sandstone, high slickrock, and cooler uplands without requiring a steep hike.
Begin with the easiest surface, evaluate heat and fatigue early, and preserve enough energy for transfers and the return journey. Zion rewards a slower plan because its defining features rise directly from the road and canyon floor. With realistic turnaround points and carefully chosen stops, travelers with limited mobility can experience the park’s immense vertical scale while keeping comfort, safety, and independence at the center of the day.
Want to keep exploring? Browse all our Zion guides and articles for more trip-planning tips and ideas.
Gear & Essentials
Tell us about your trip and we will add what else you will want:
The basics
Worth having in the car whatever the park.
For this trip
Traveling with kids
Bringing a pet
RVing
Backcountry
Winter conditions
On the water
Photography
Accessibility
As an Amazon Associate we earn from qualifying purchases, at no extra cost to you.